The Conversation (0)
Sign Up
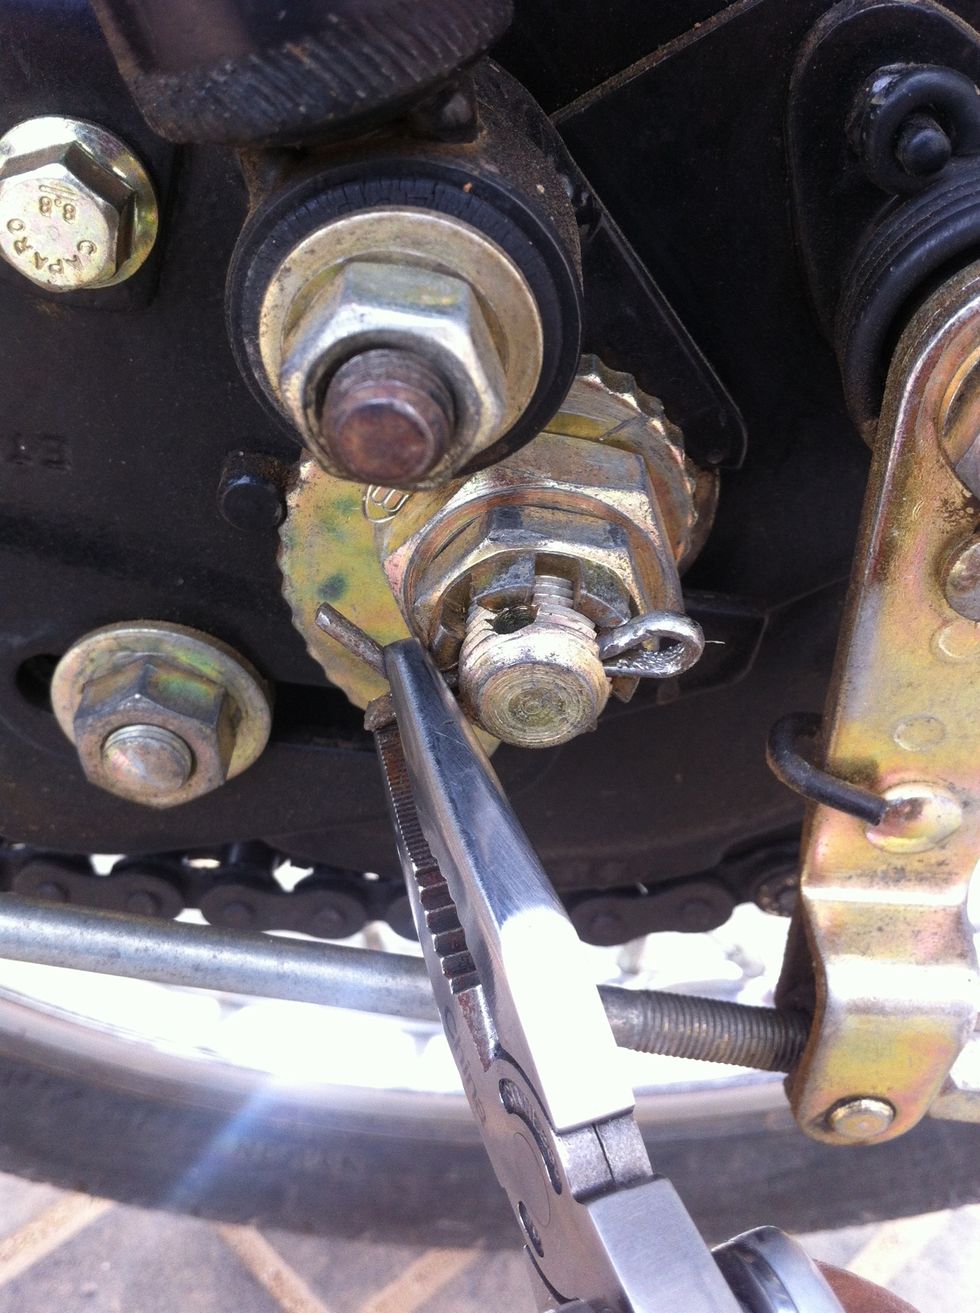
Remove the pin by straightening the bend ends. Some motorcycles may not have this pin.
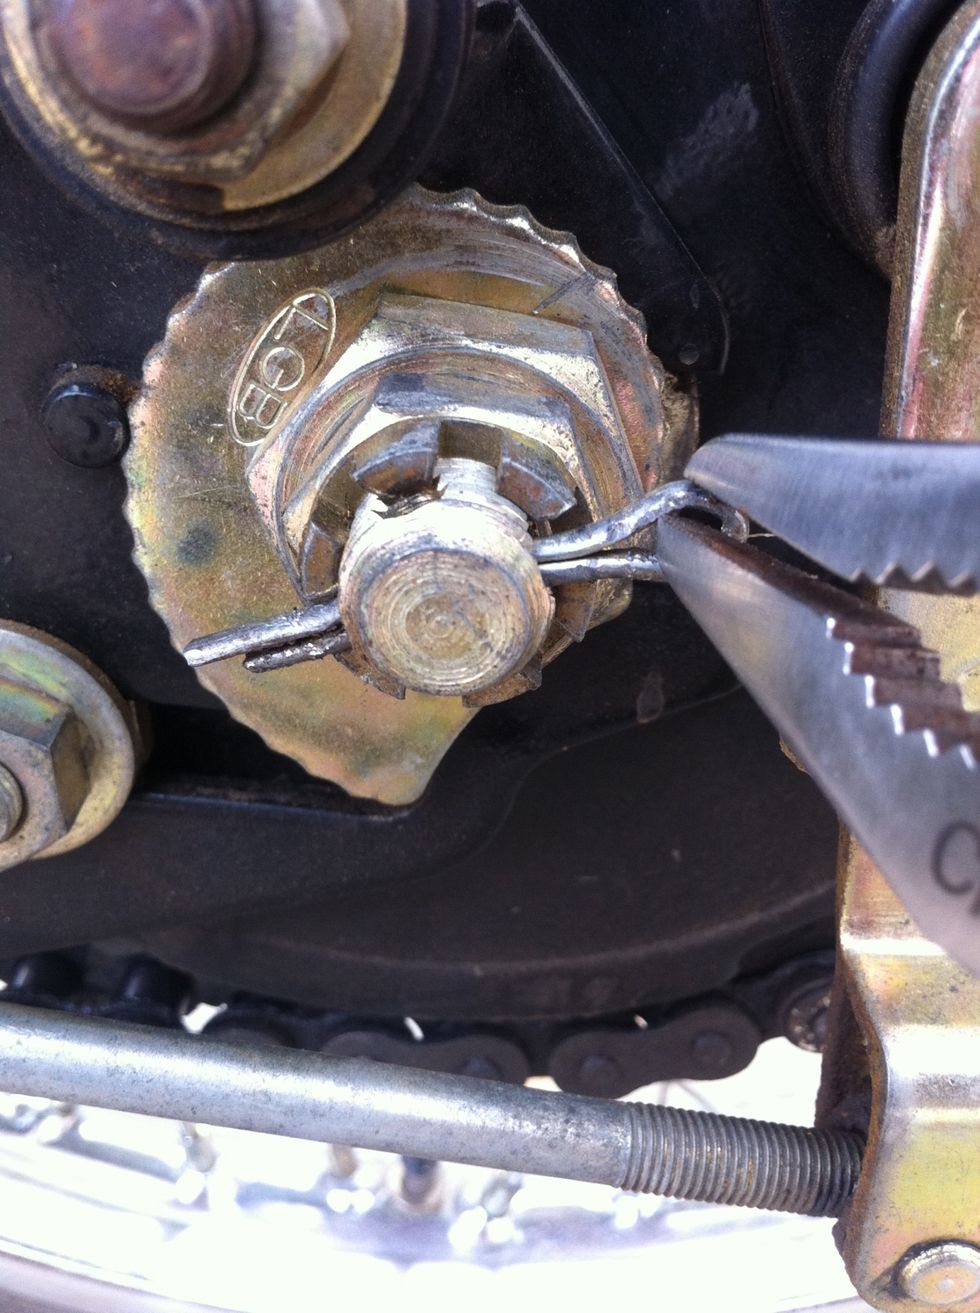
Pull out the pin which has the legs straightened.
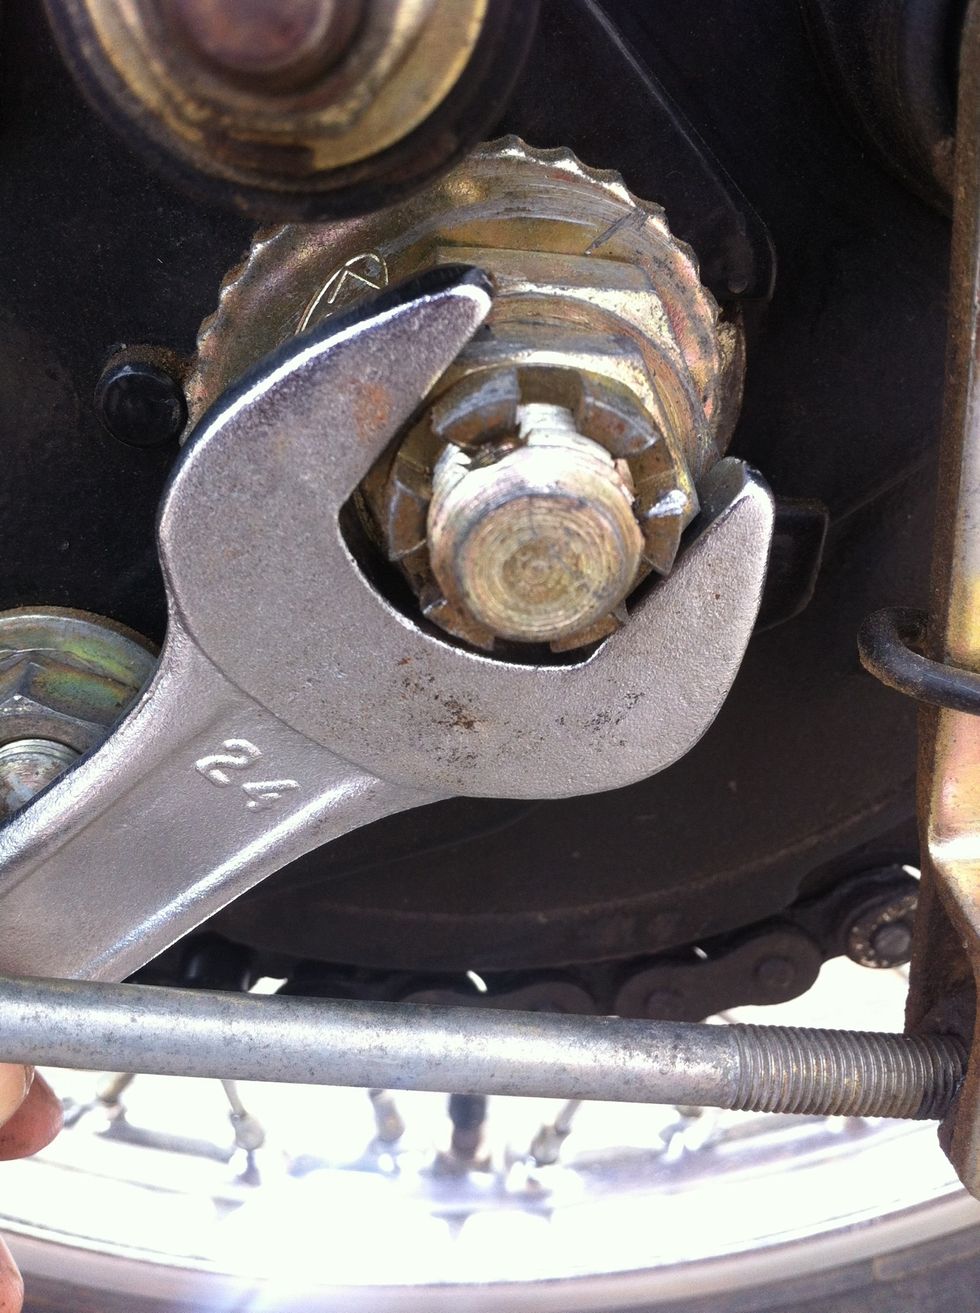
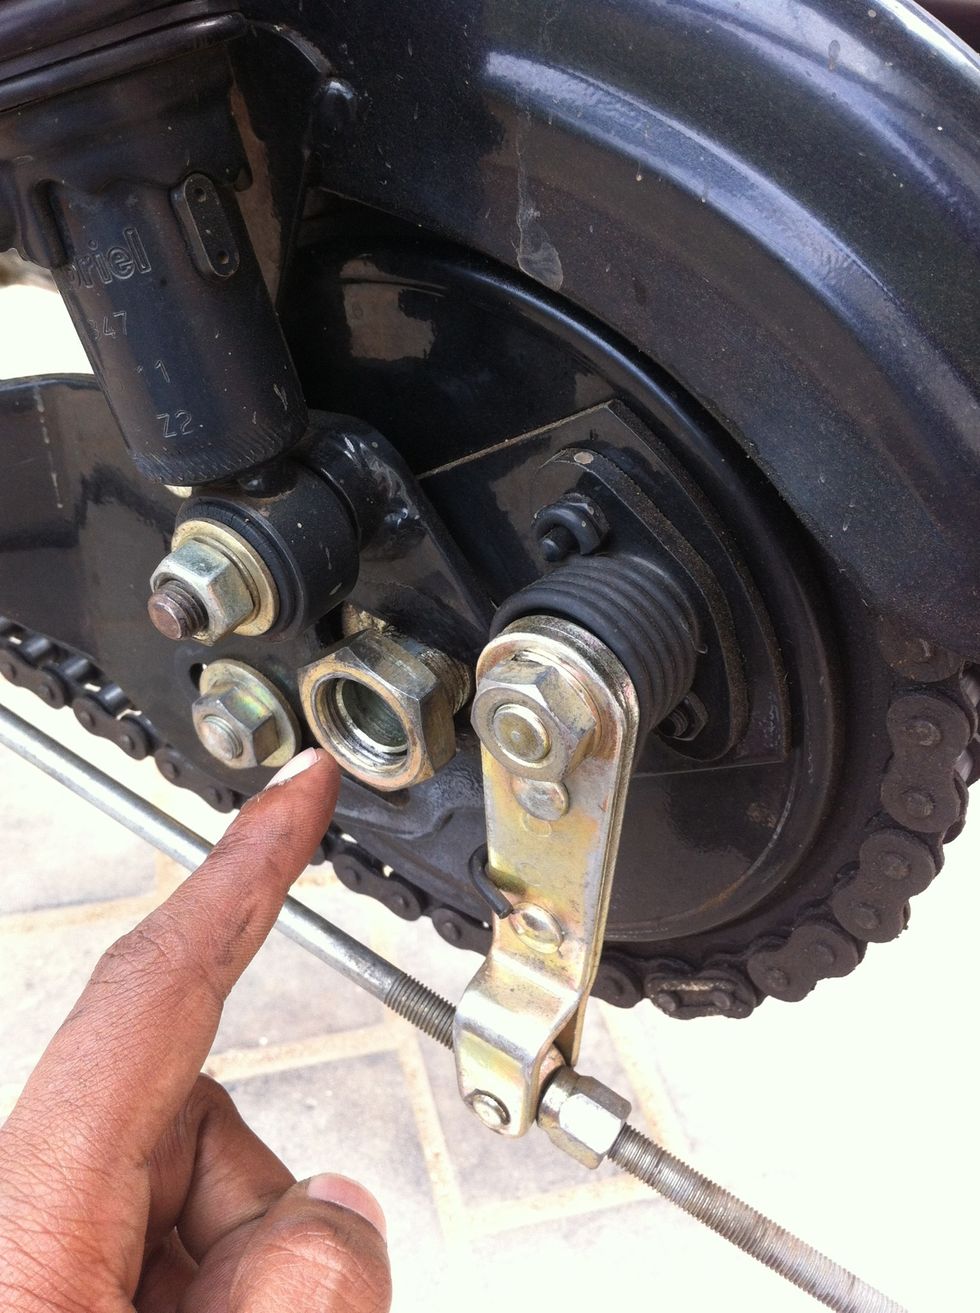
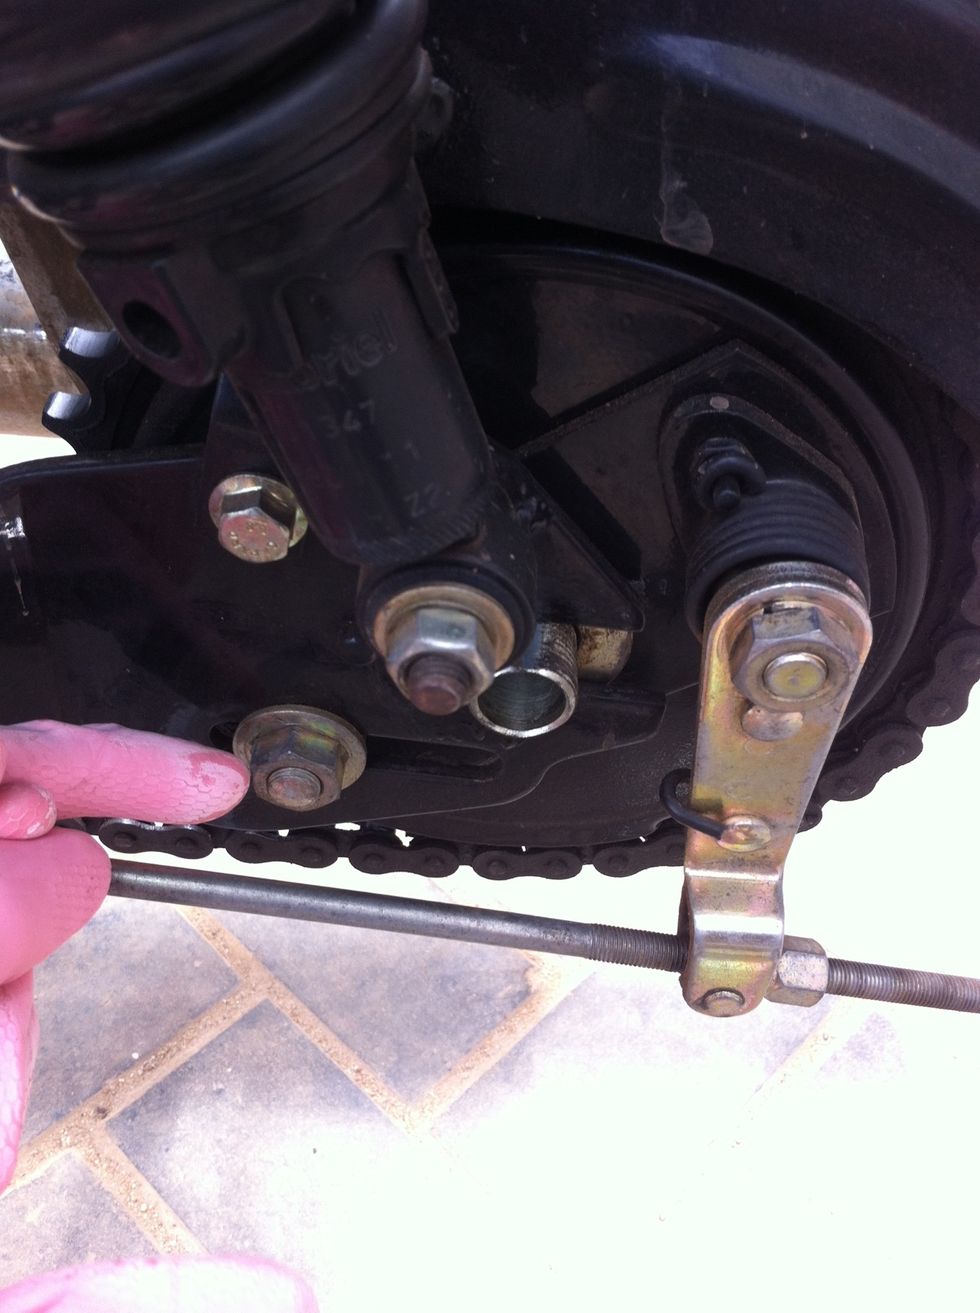
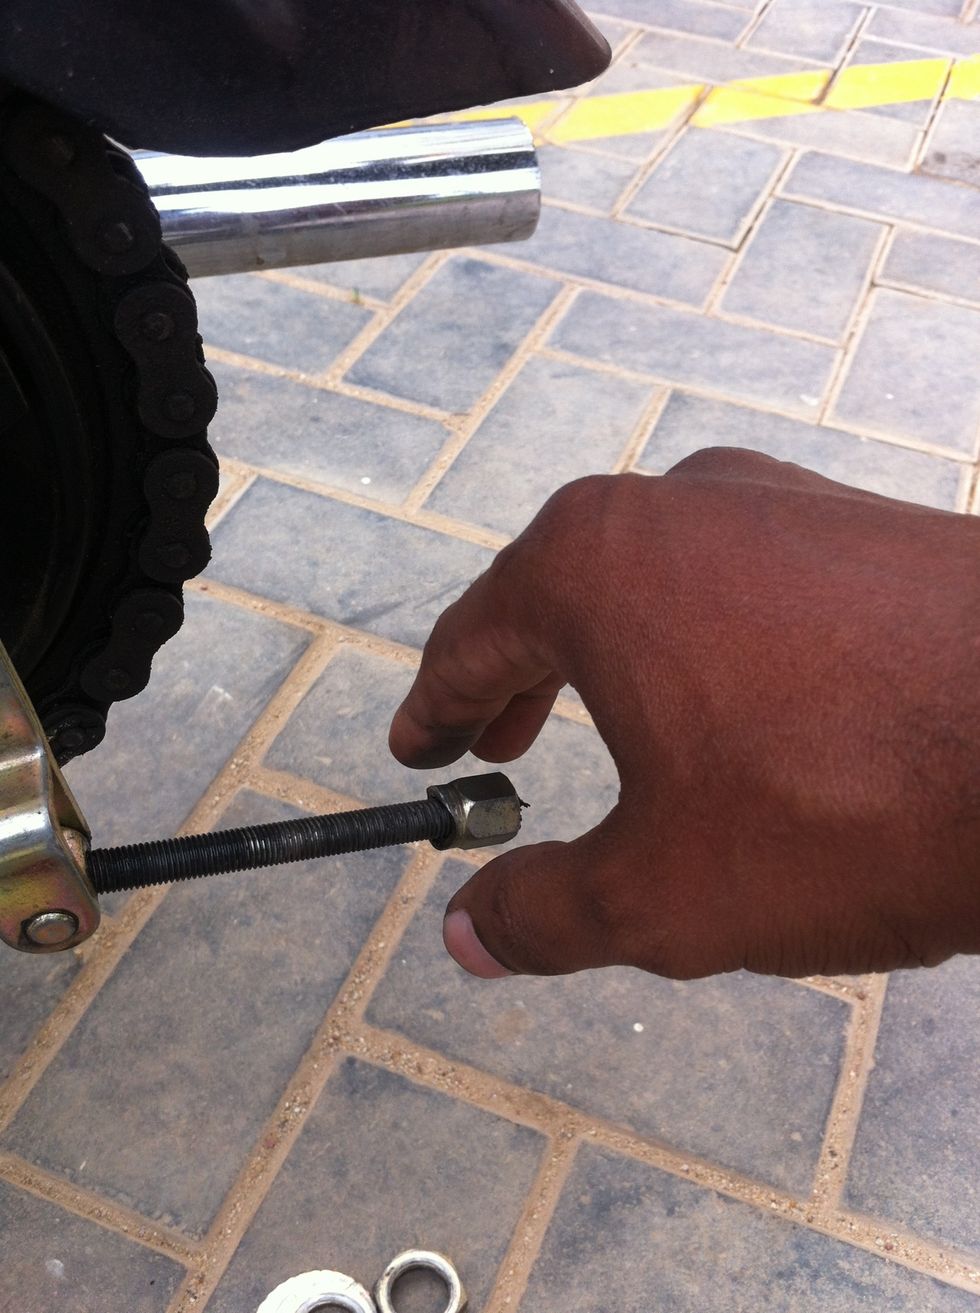
Use a 24 mm spanner to remove the first nut. Rotate anti clock wise to remove this nut. This is the nut that holds the stud that holds the entire rear wheel.
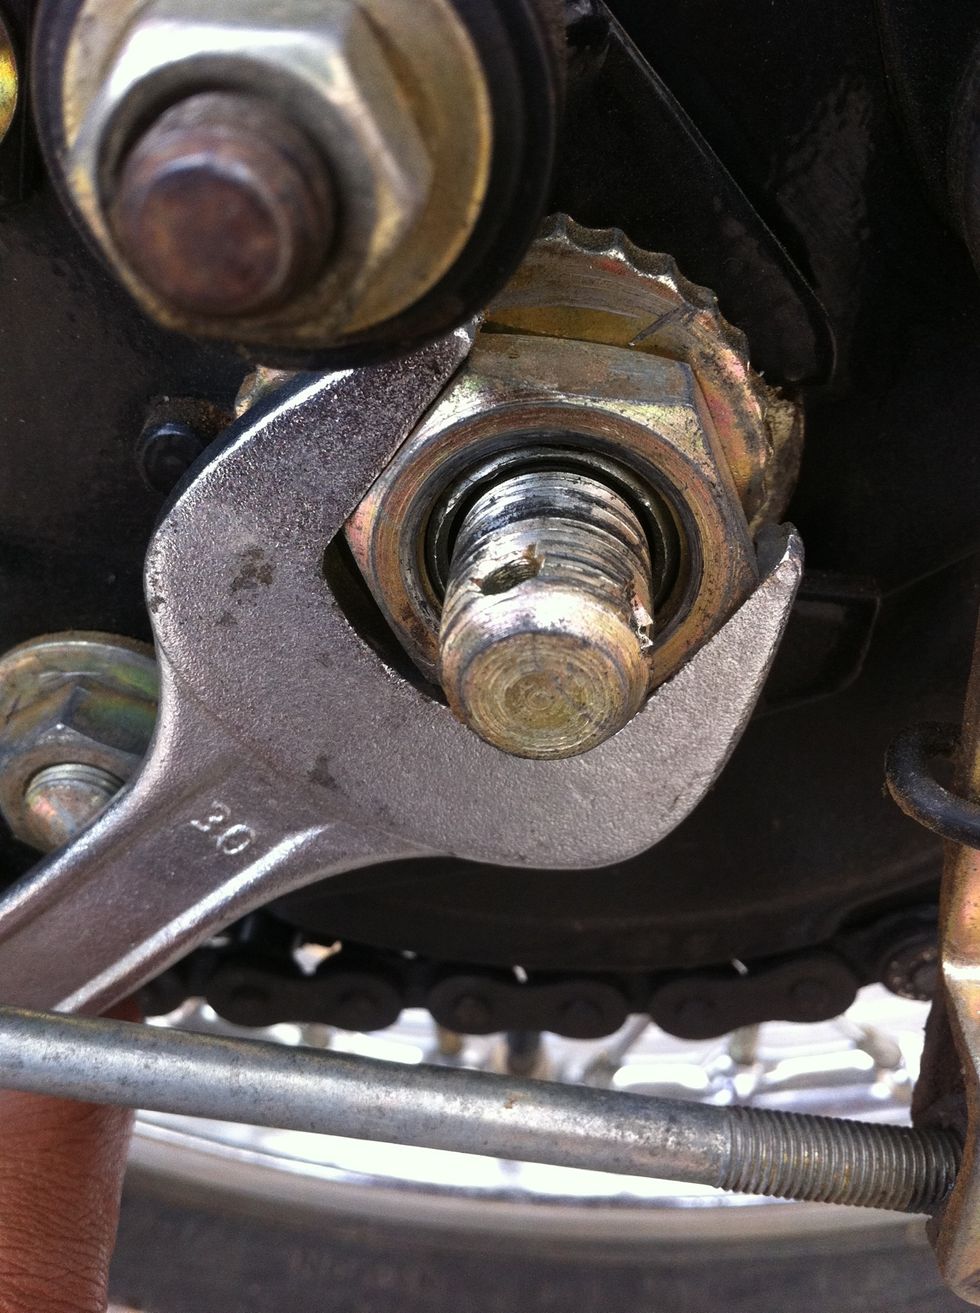
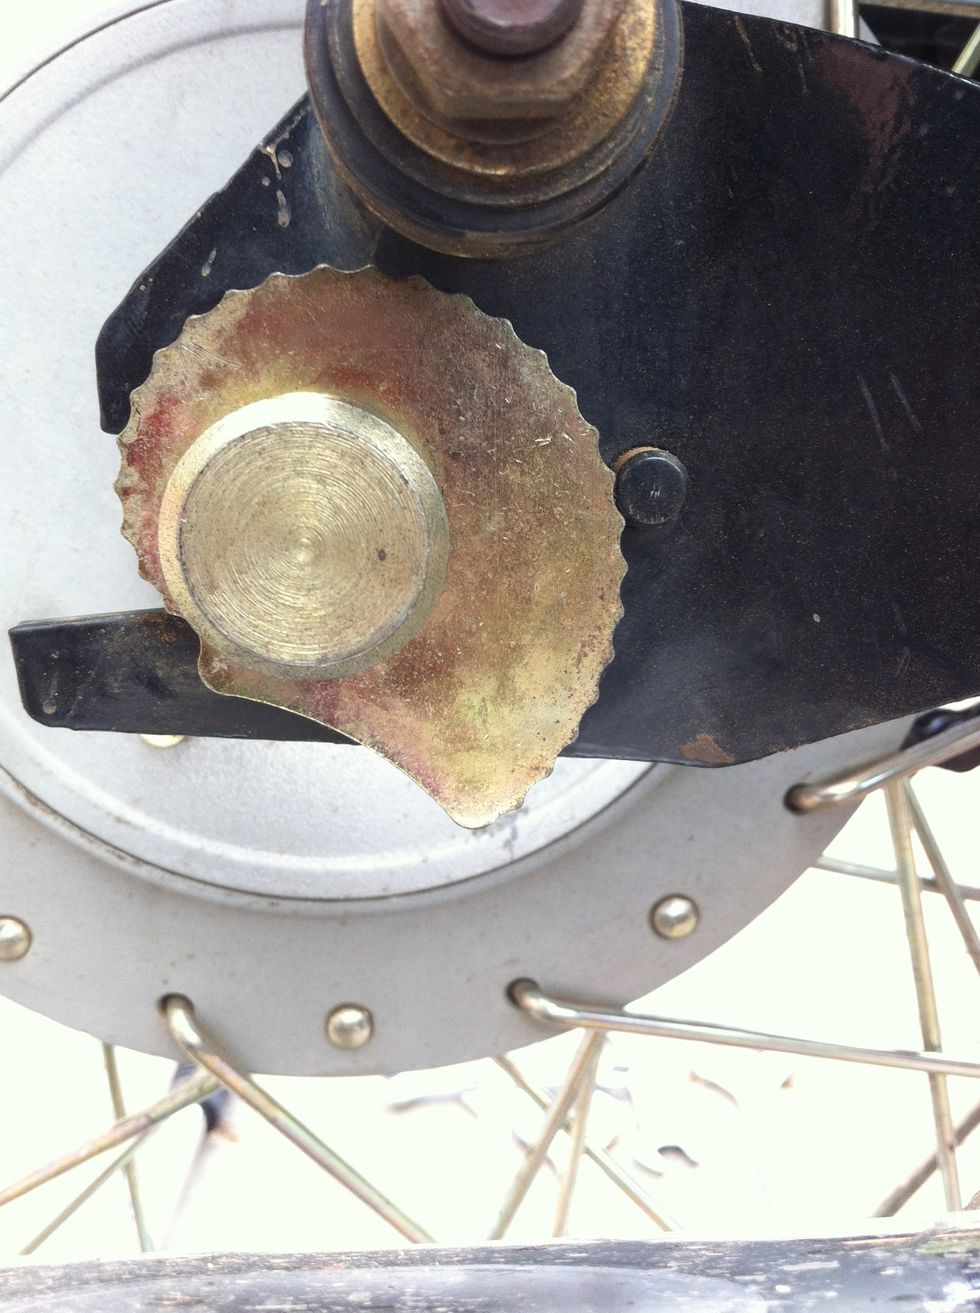
This 30mm nut holds the brake and sprocket assembly. Remove this only after you remove the rear wheel.
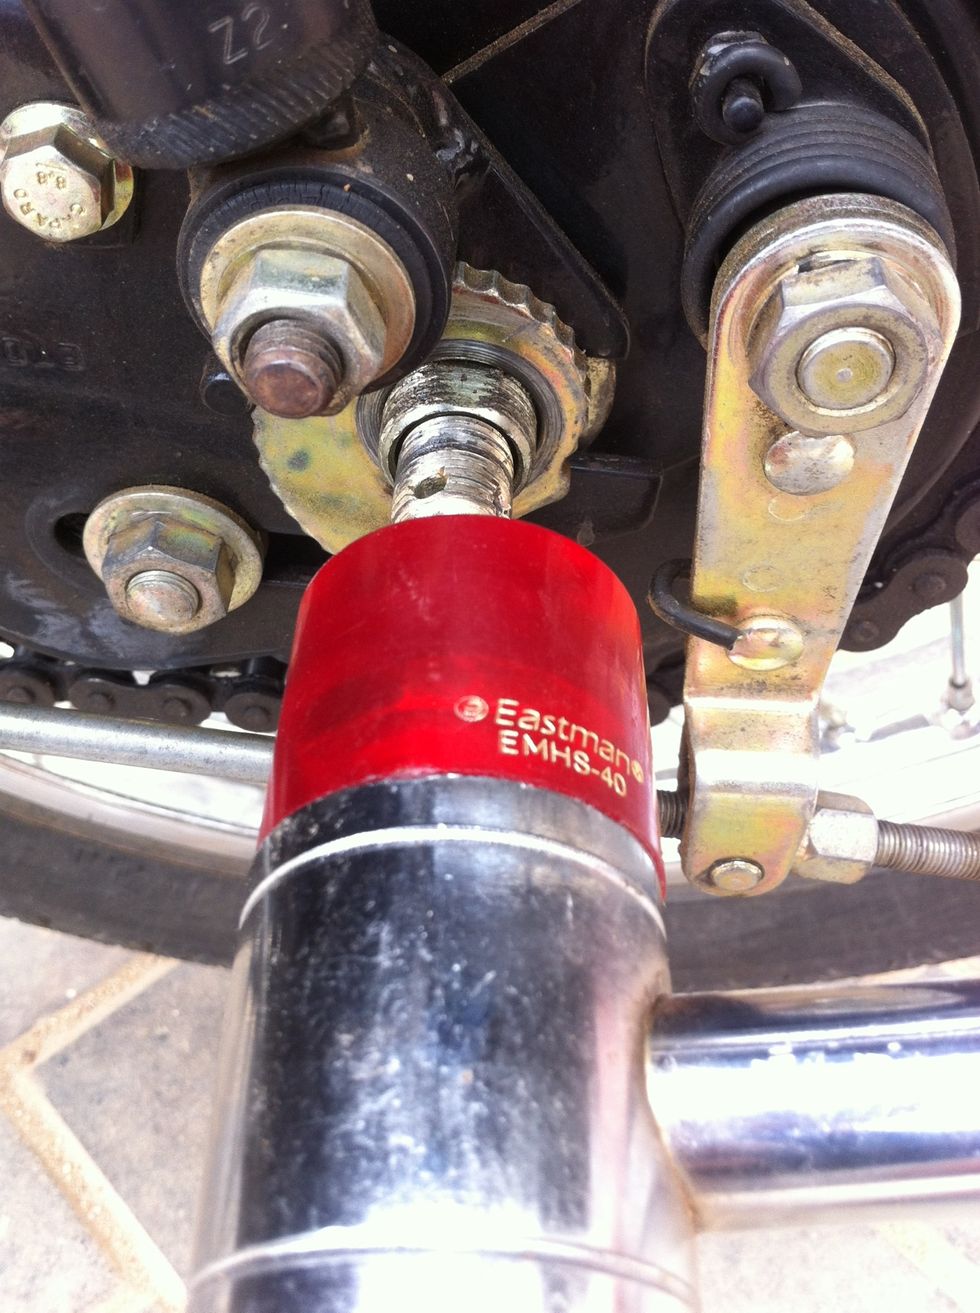
Tap on the stud lightly with a nylon or plastic ended hammer.

The main stud will pop out as above. Remove the stud out and take care of the washers that fall along. In Step 3 you might need to lock this stud using a rod through the hole if the stud rotates.
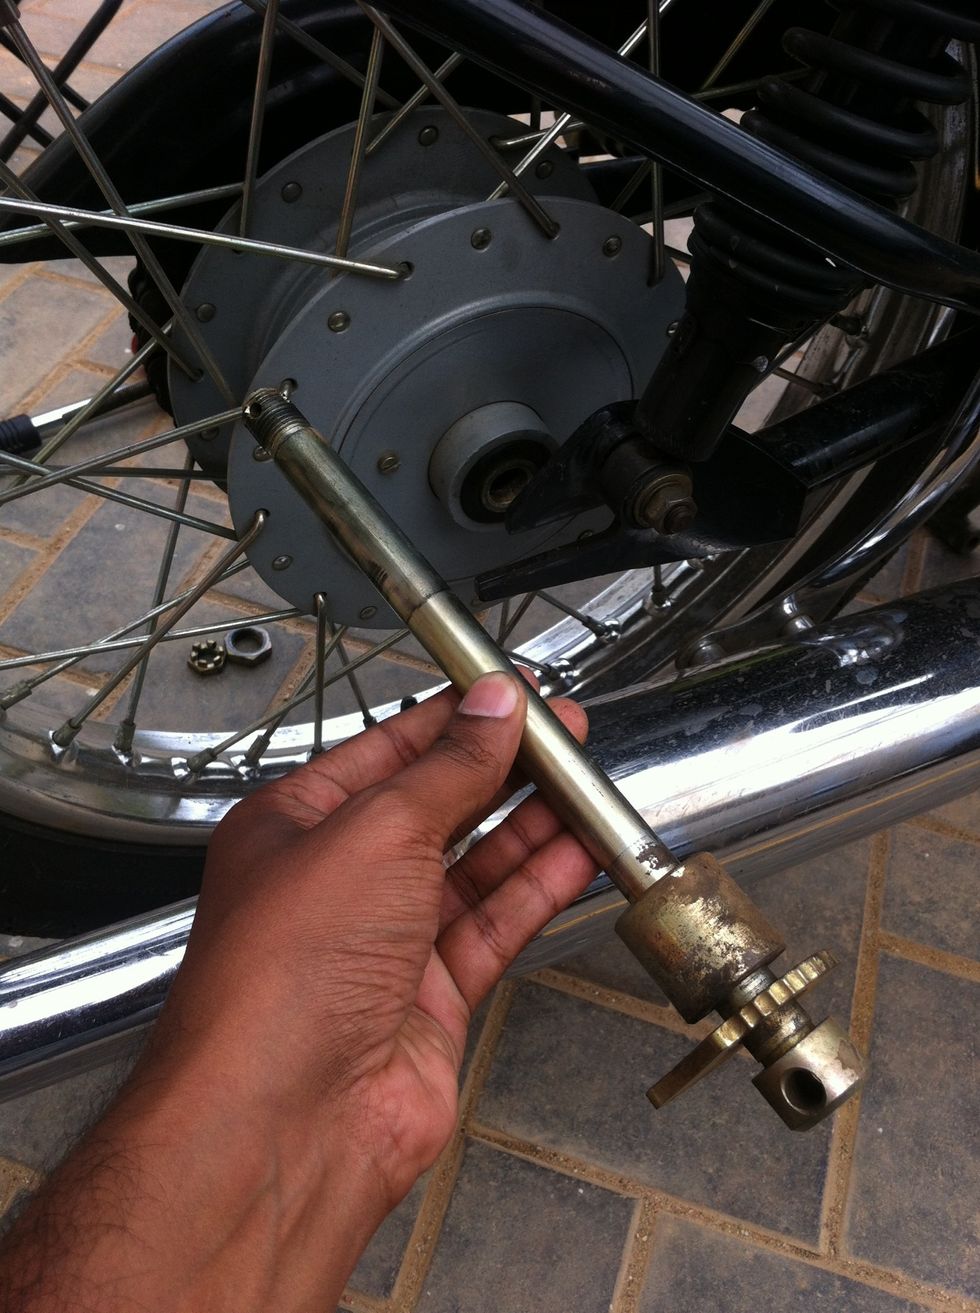
The stud along with the spacer and wheel alignment adjuster.
IMPORTANT - Note that there is one more small stepped bush on the wheel centre. Please take extra care not to loose, forget this while assembling back.
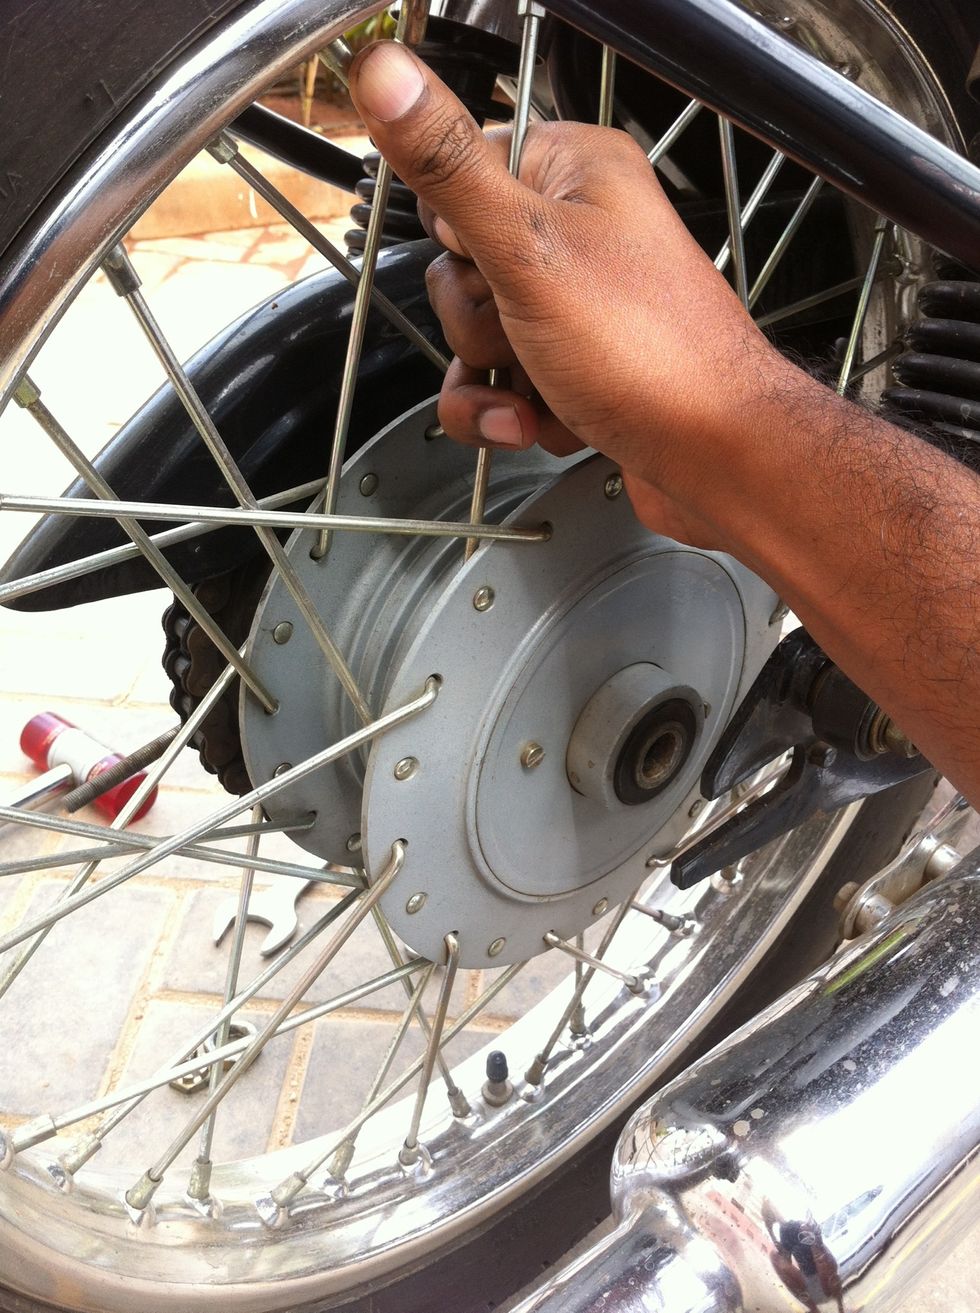
Pull the rear wheel out using both hands. ( See in image the stepped bush is still in place. Remove that prior to wheel handling and keep it along with the big spacer on the axle rod )
The rear wheel can be easily pulled out by tilting the bike to the left of the motorcycle. Now you see the chain and brake assembly here. You can choose not to remove the chain links.
Remove the 30mm nut.
Remove the brake shoe housing stay nut using a 18mm spanner.
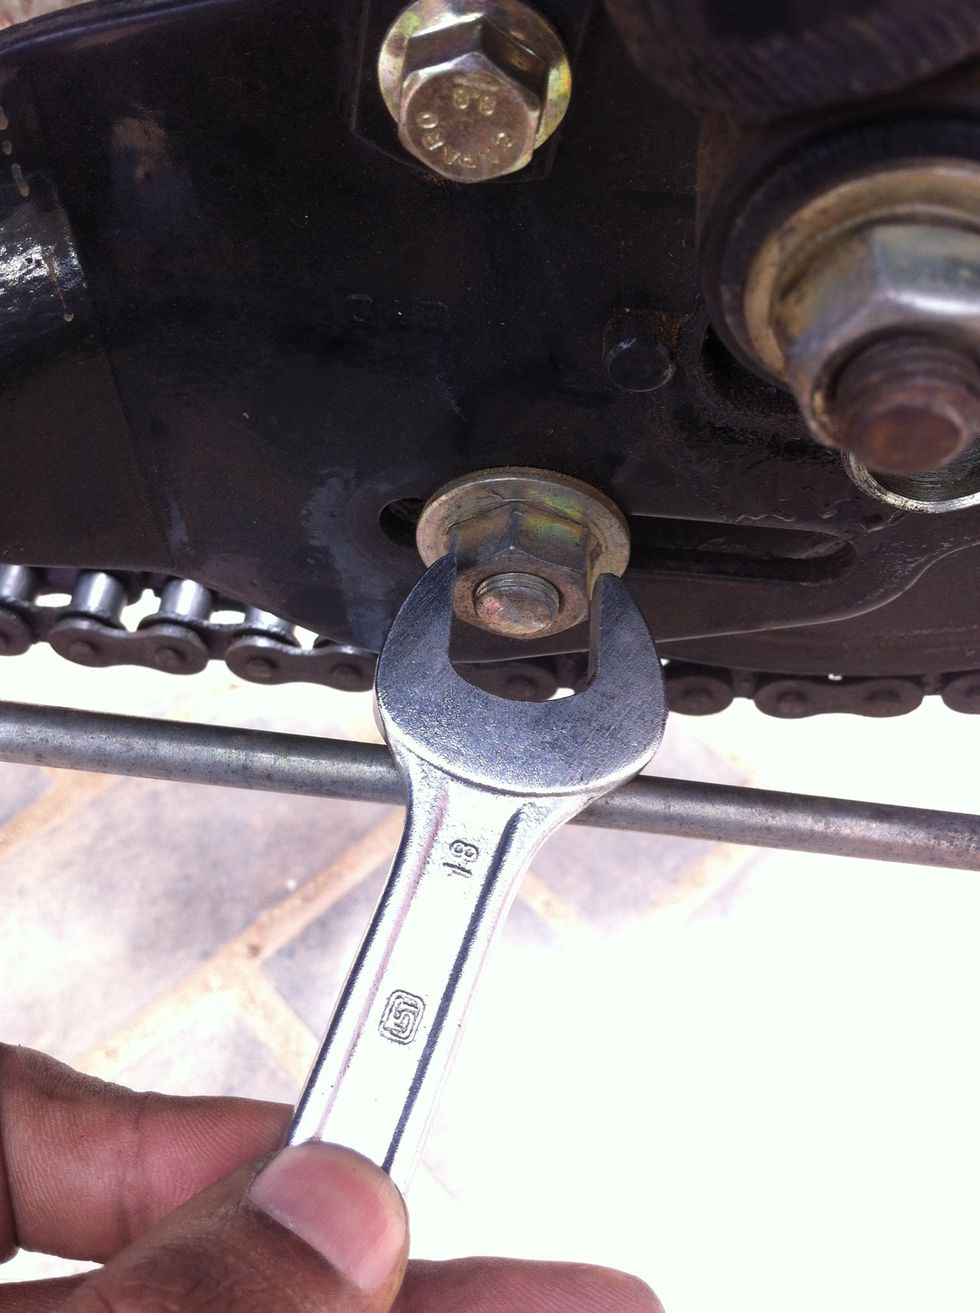
Rotate anti clock wise to remove this 18mm nut
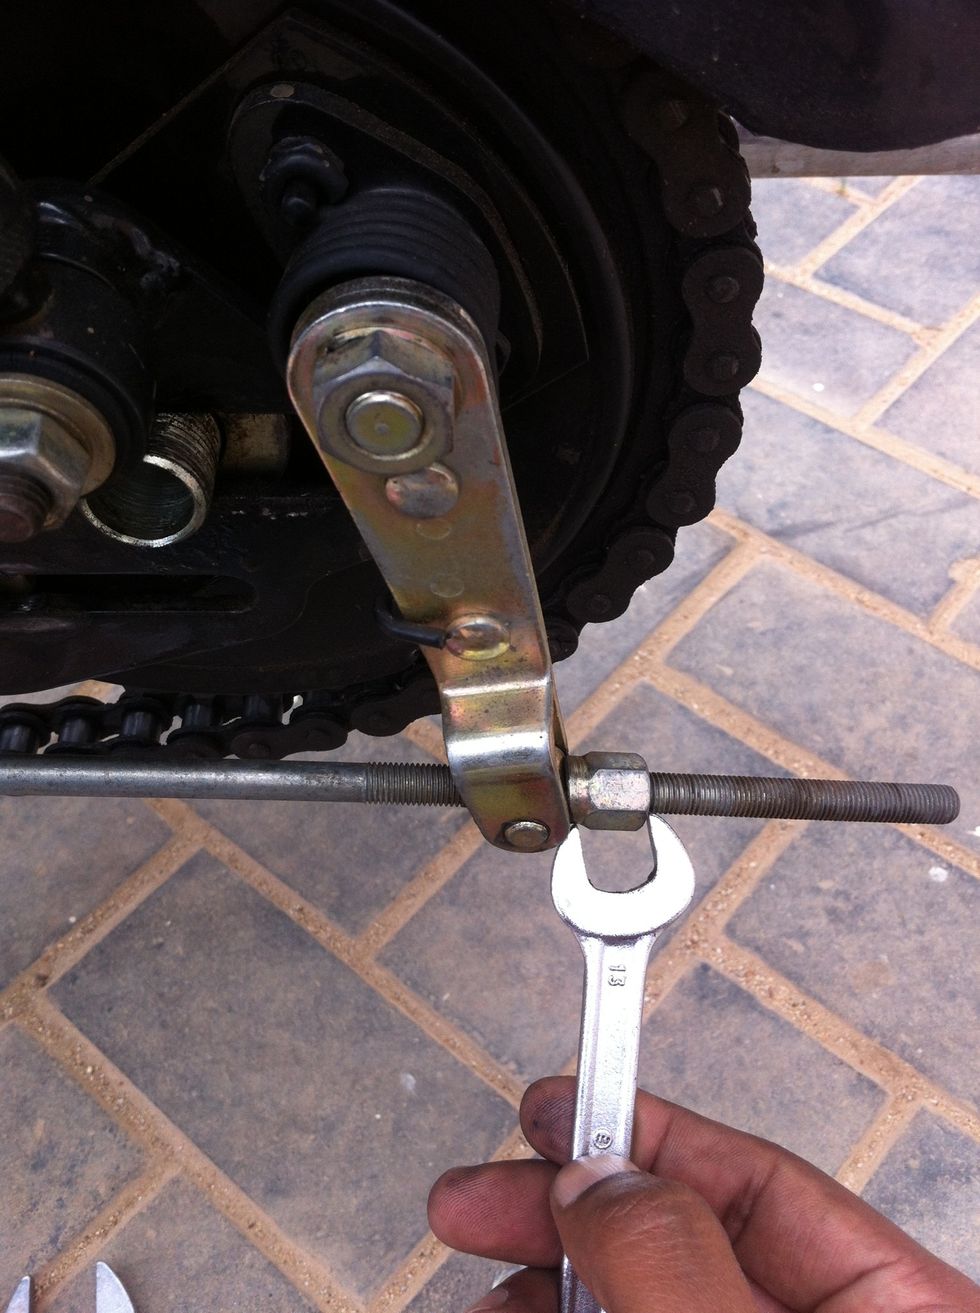
You can now remove the brake rod using a 13mm spanner
Loosen it and remove it by hand
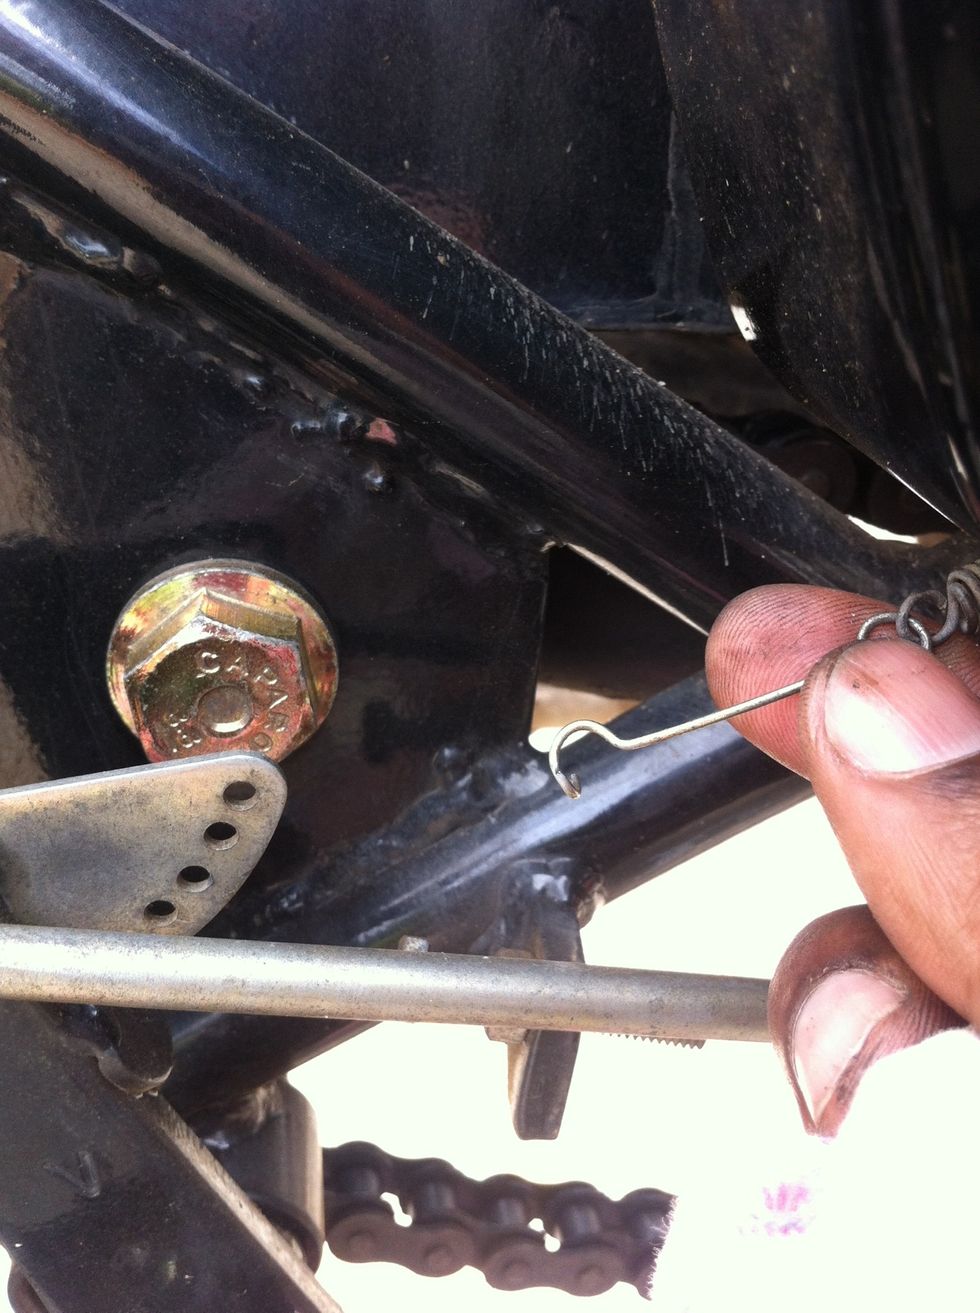
Unhook the brake light switch tension spring.

Remove the brake connecting rod out of the hook.
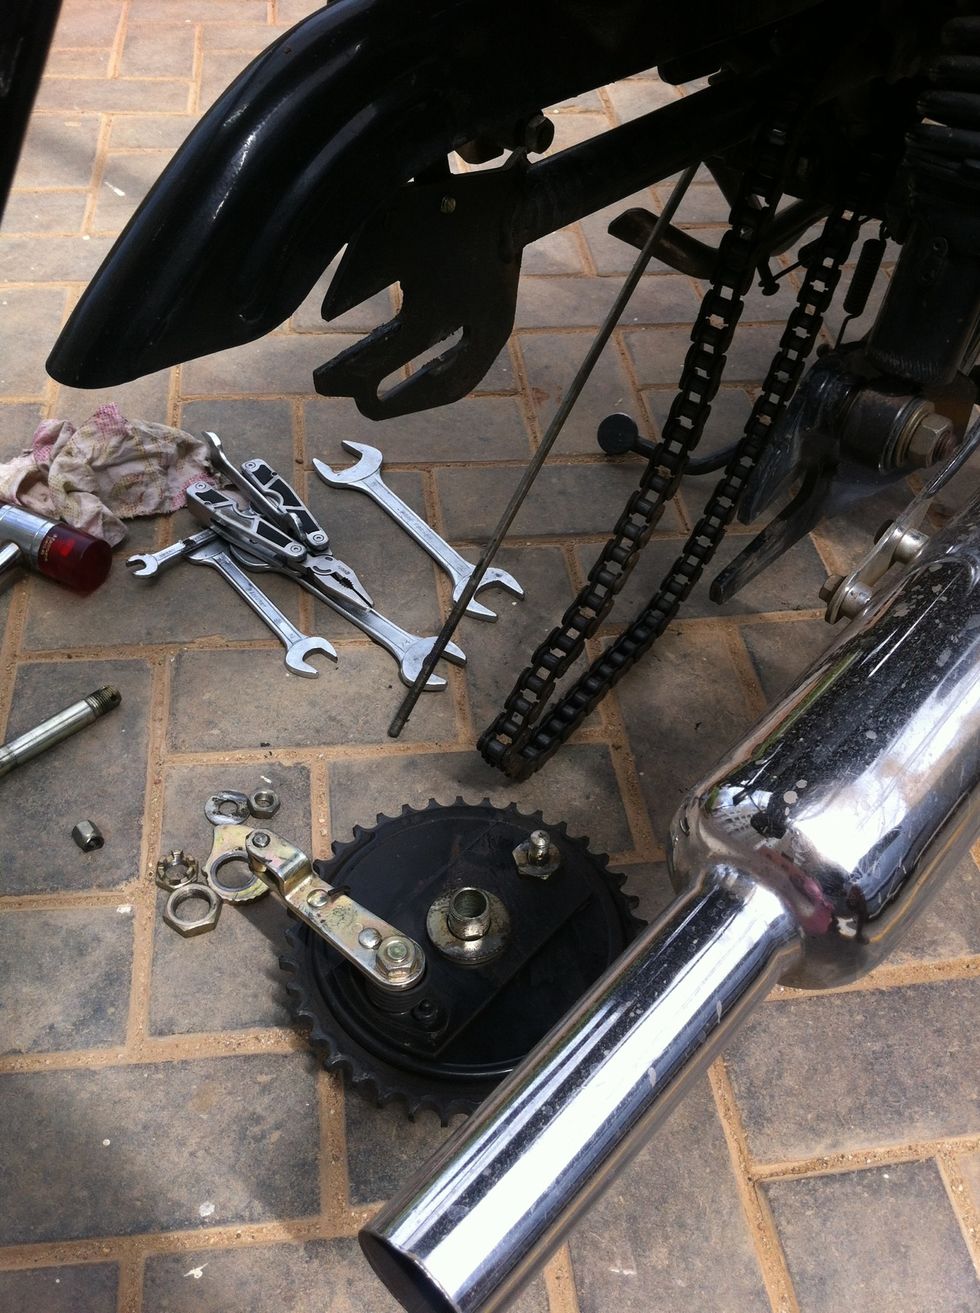
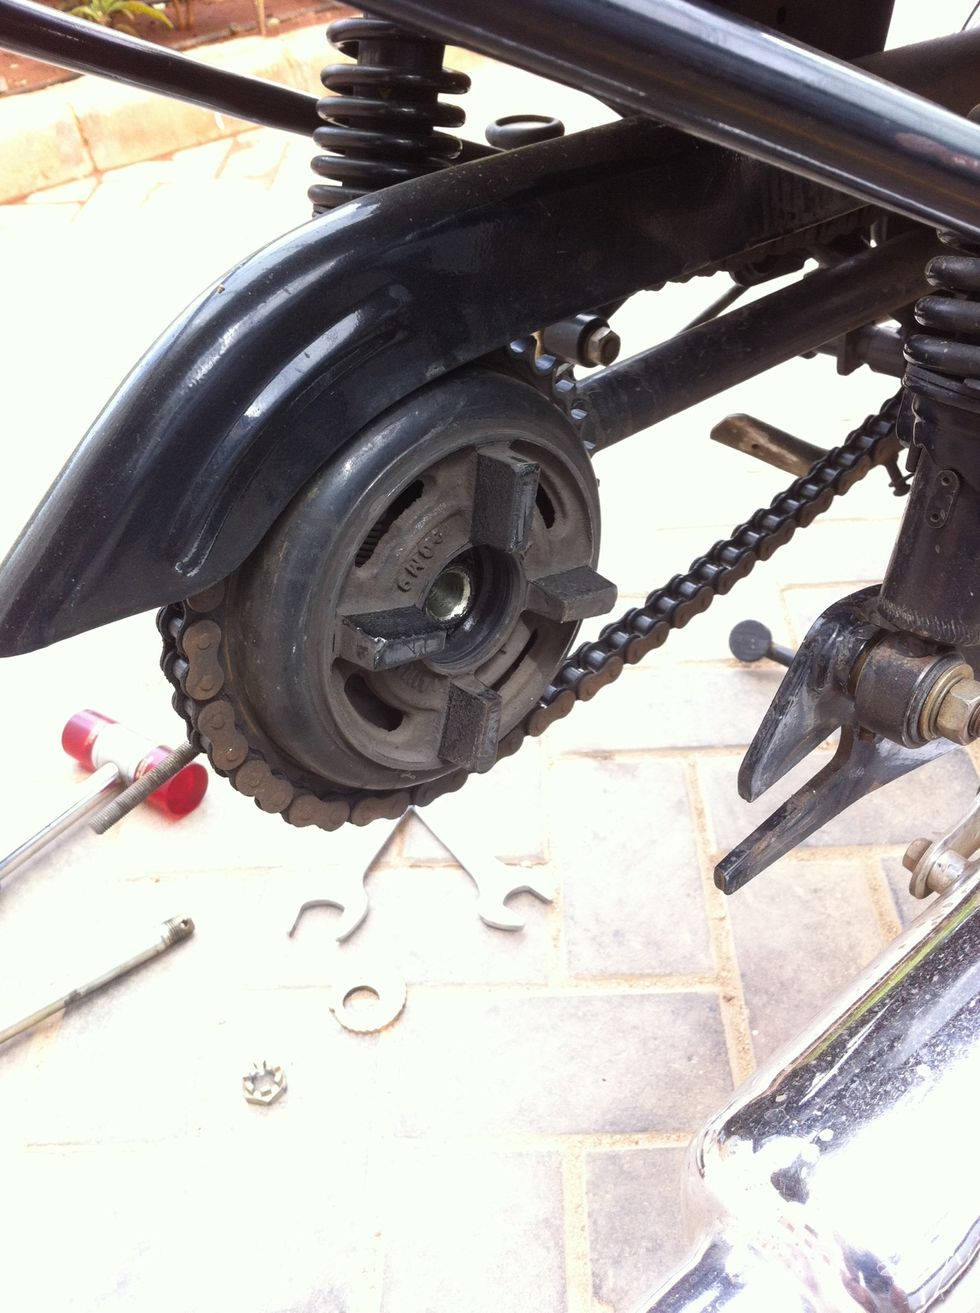
Now you should be able to remove the chain sprocket by carefully nudging it forward and unhooking the chain from the sprocket
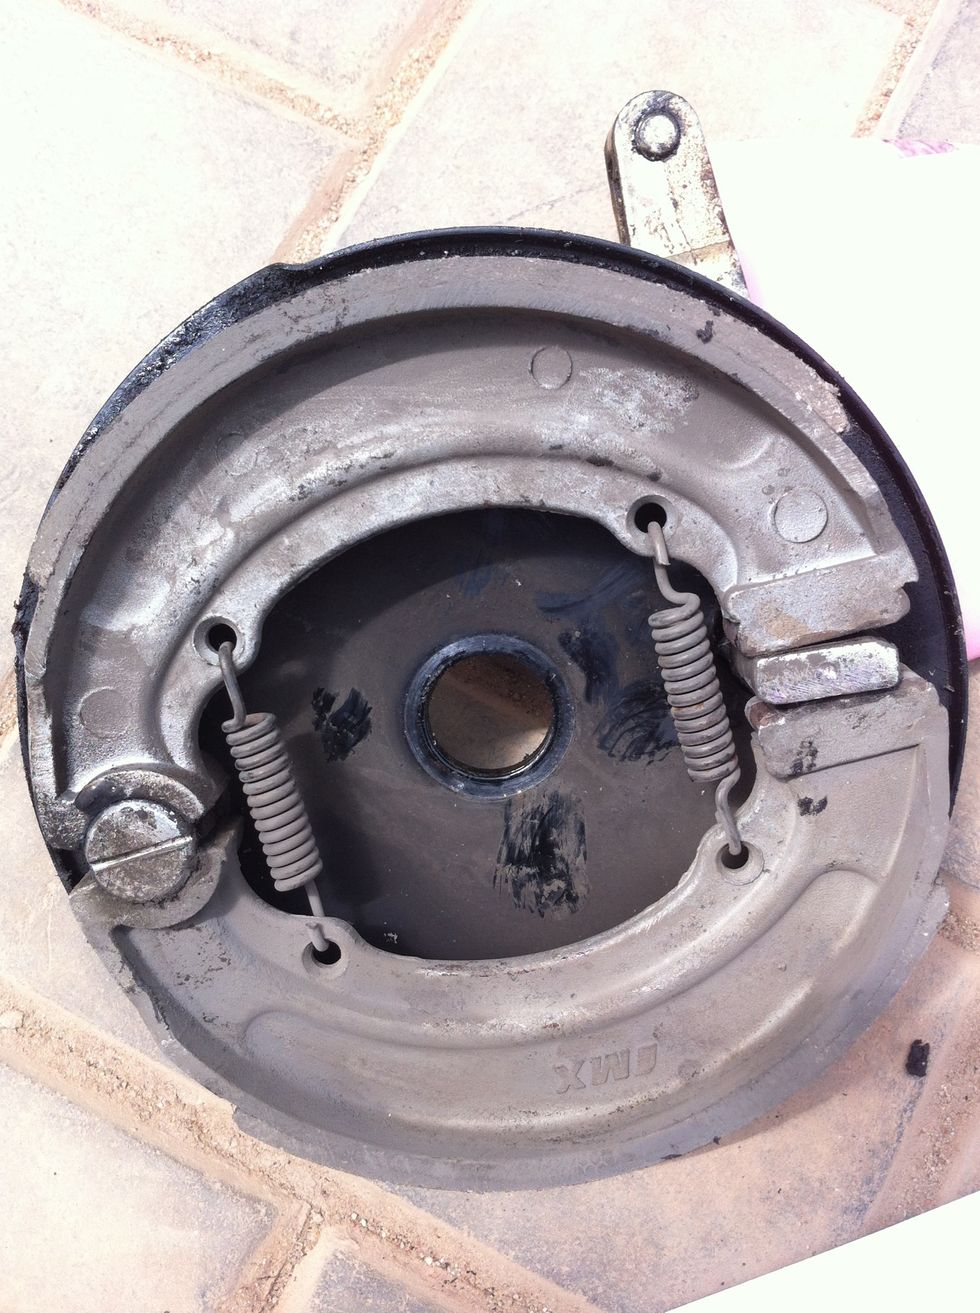
Now the brake assembly will pop out. Inspect and decide for replacement or cleanup. Remove the brake shoes by bending them inwards like the opposite way of breaking bread. Take care of the springs.
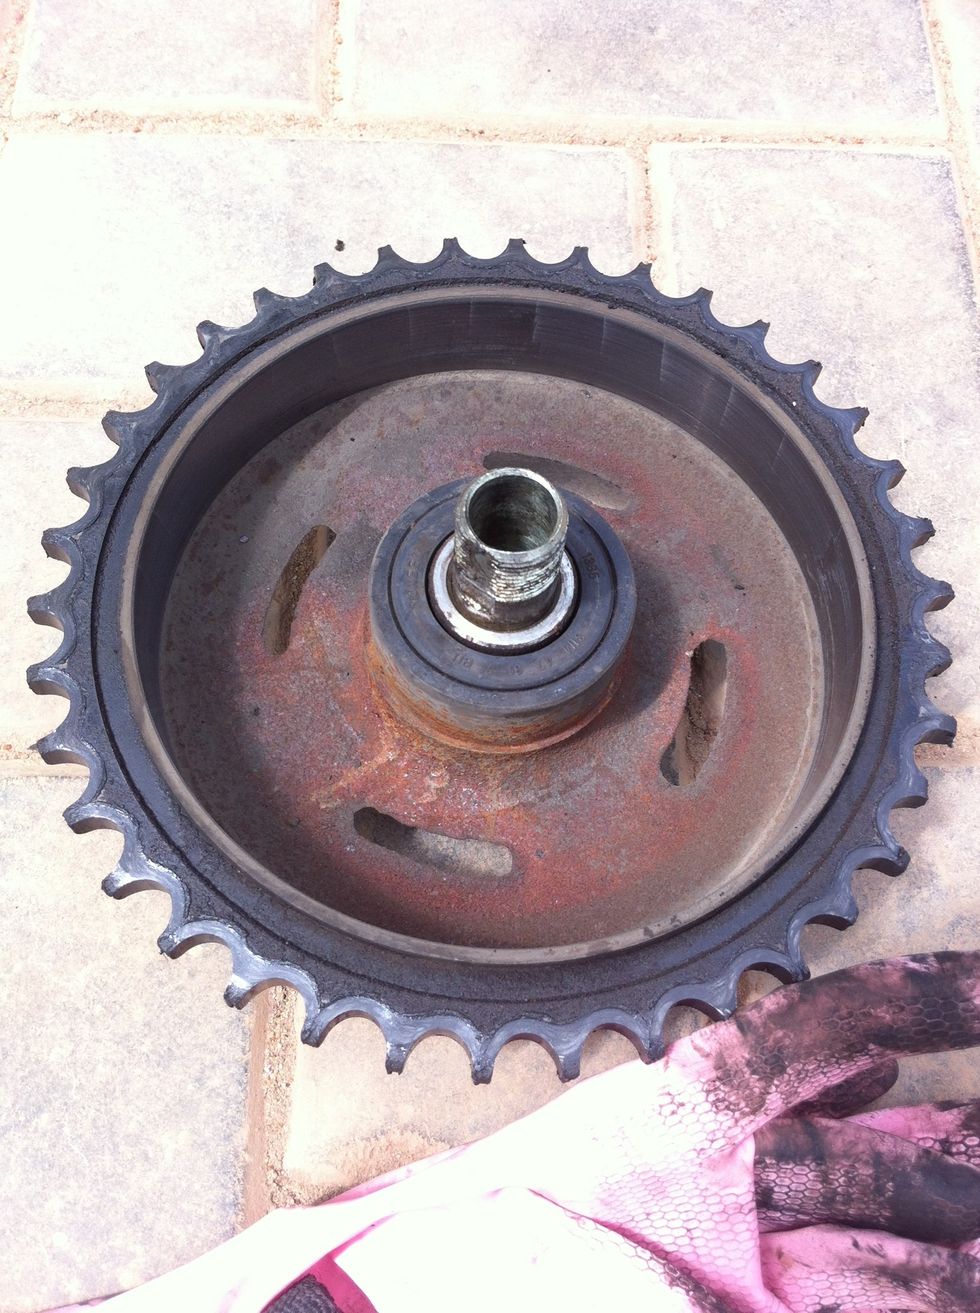
Inspect the sprocket and also slightly sand the inside rim to get better braking since usage makes the surface smooth.
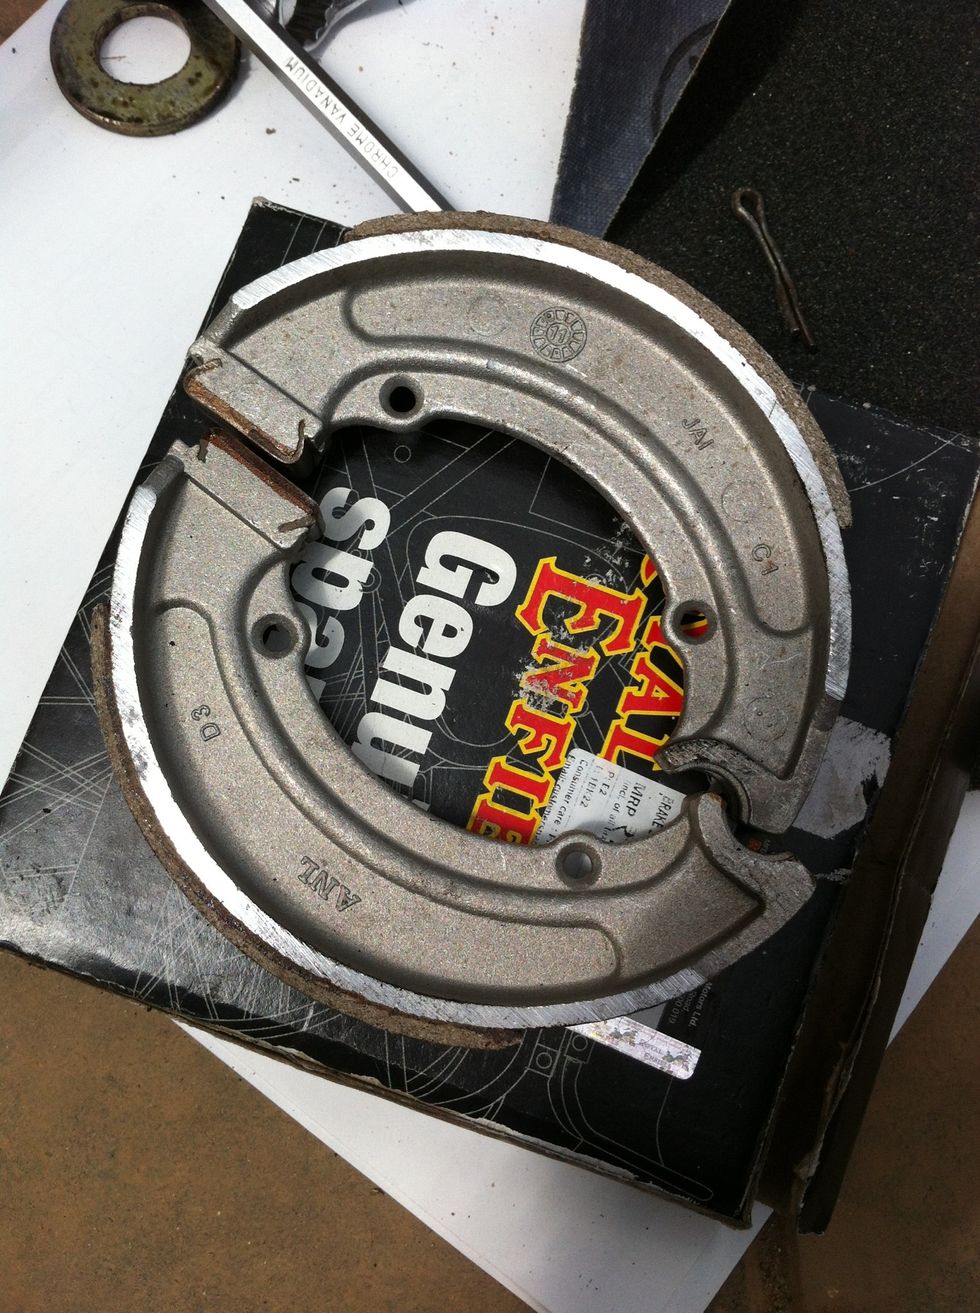
Use new brake shoes

If you choose to repair the existing. Use a sand paper and roughen up the surface
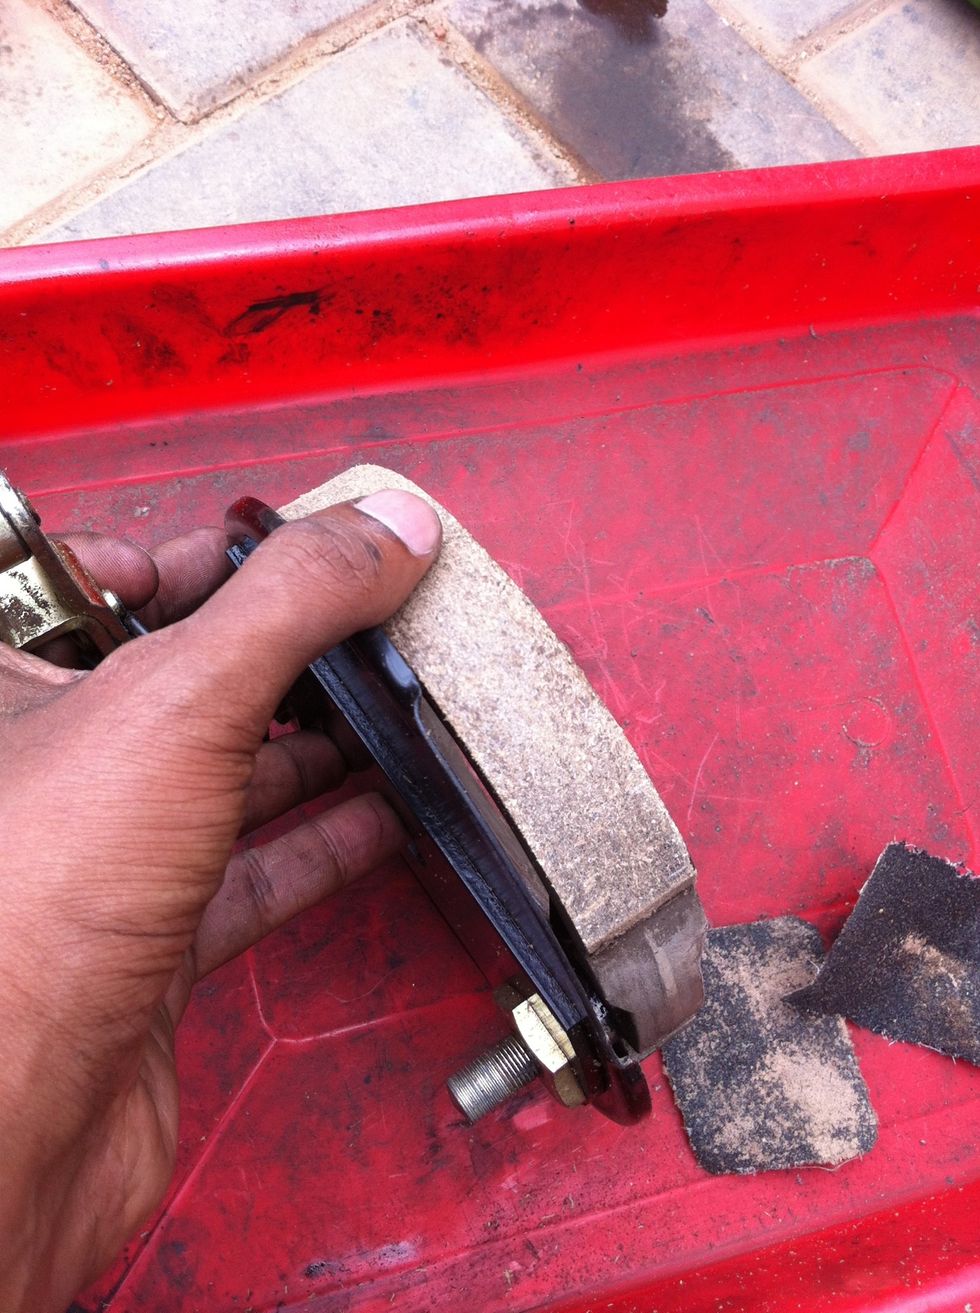
Sand until surface is rough

Notice the new brake show surface (right) and a sanded surface (left)
After refitting the brake shoe repeat the steps backward to re assemble the sprocket and wheel
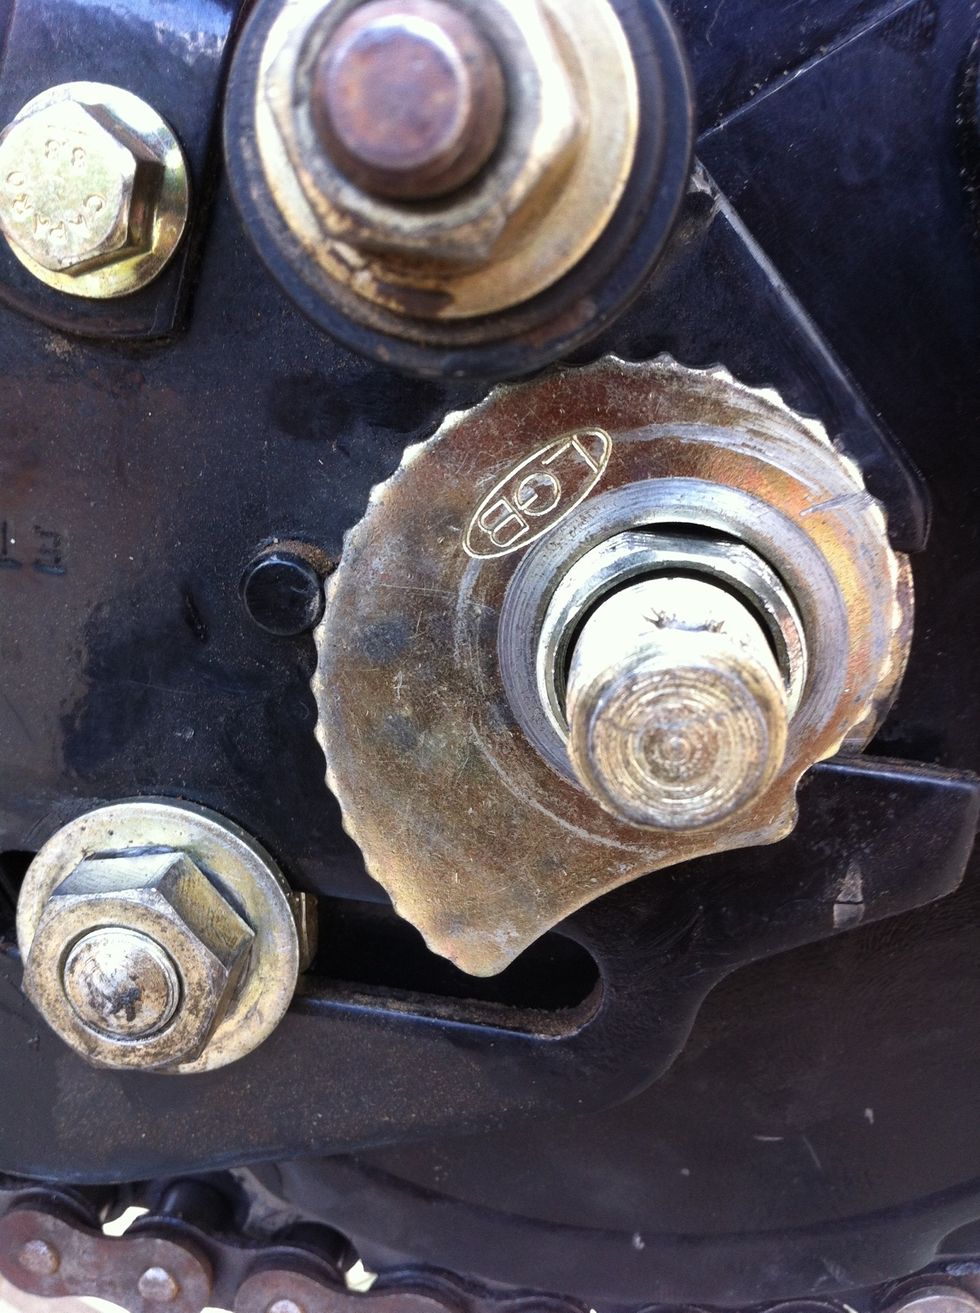
While reassembling take care to count the number of notches on the wheel retracter.
Use the same number of notch in the other side.
Tighten all nuts. Put back pin and bend the legs of the pin. Rotate the wheel and apply brake to check tension etc.
Start the bike on center stand and put in first gear and inspect if rear wheel is wobbling. Double check notches on wheel retractor.
Go for a test ride. Dont forget to wear a helmet