The Conversation (0)
Sign Up
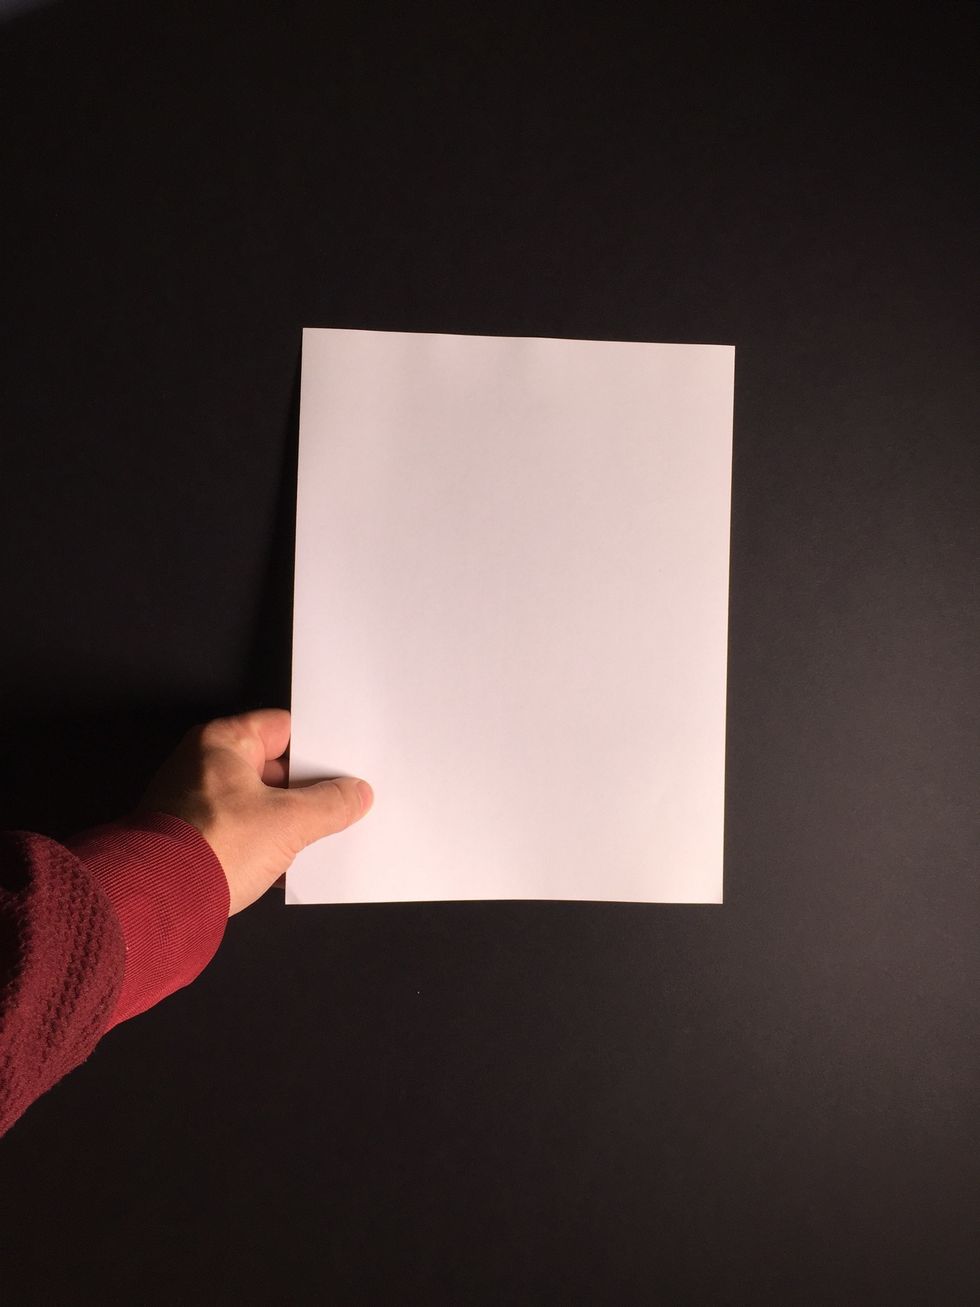
Start with an ordinary sheet of paper. It must be rectangular.
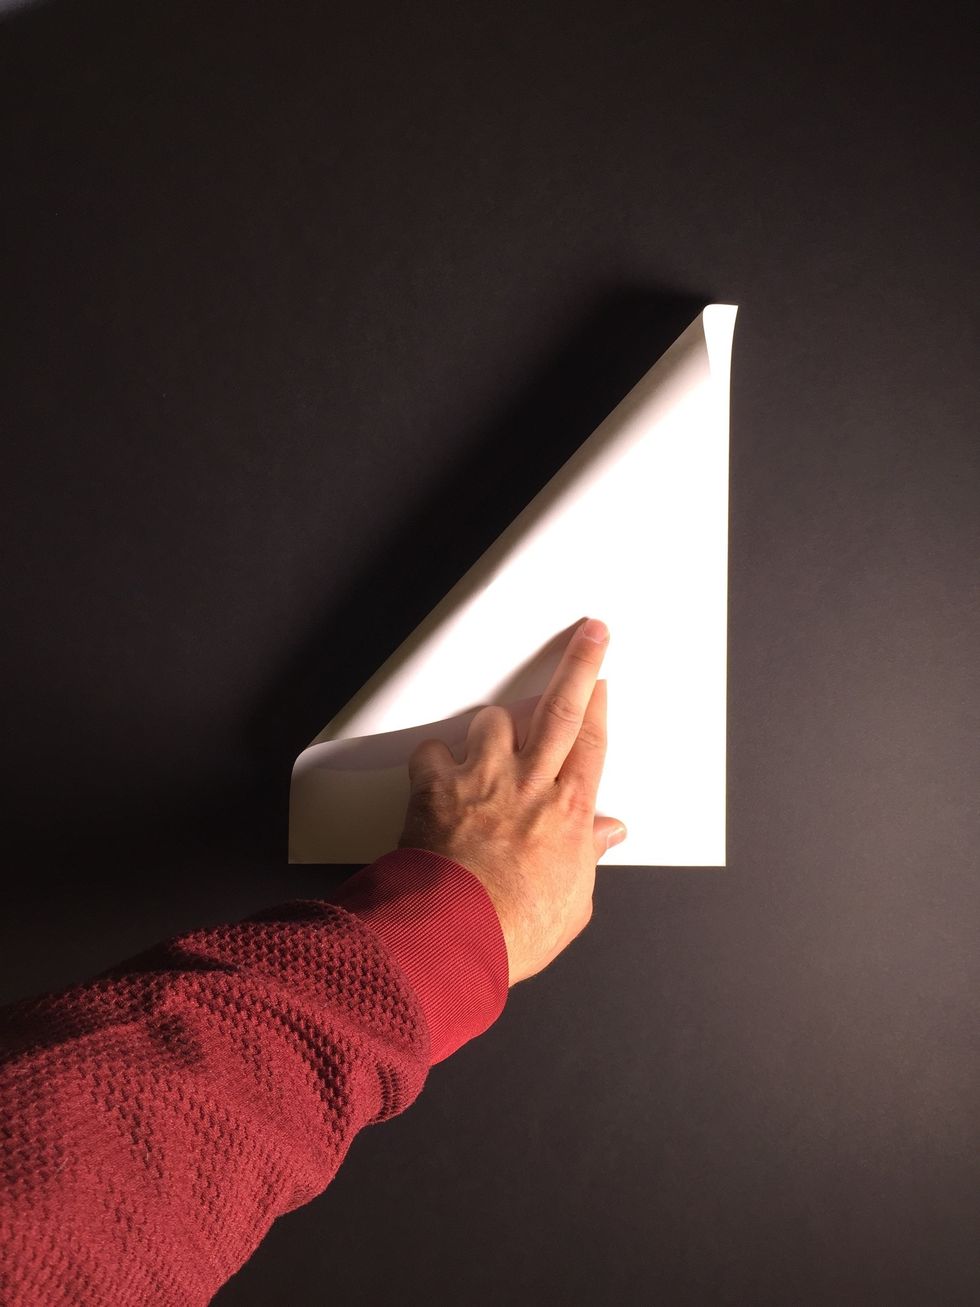
Fold over the left-hand corner as shown.
Crease. Then unfold.
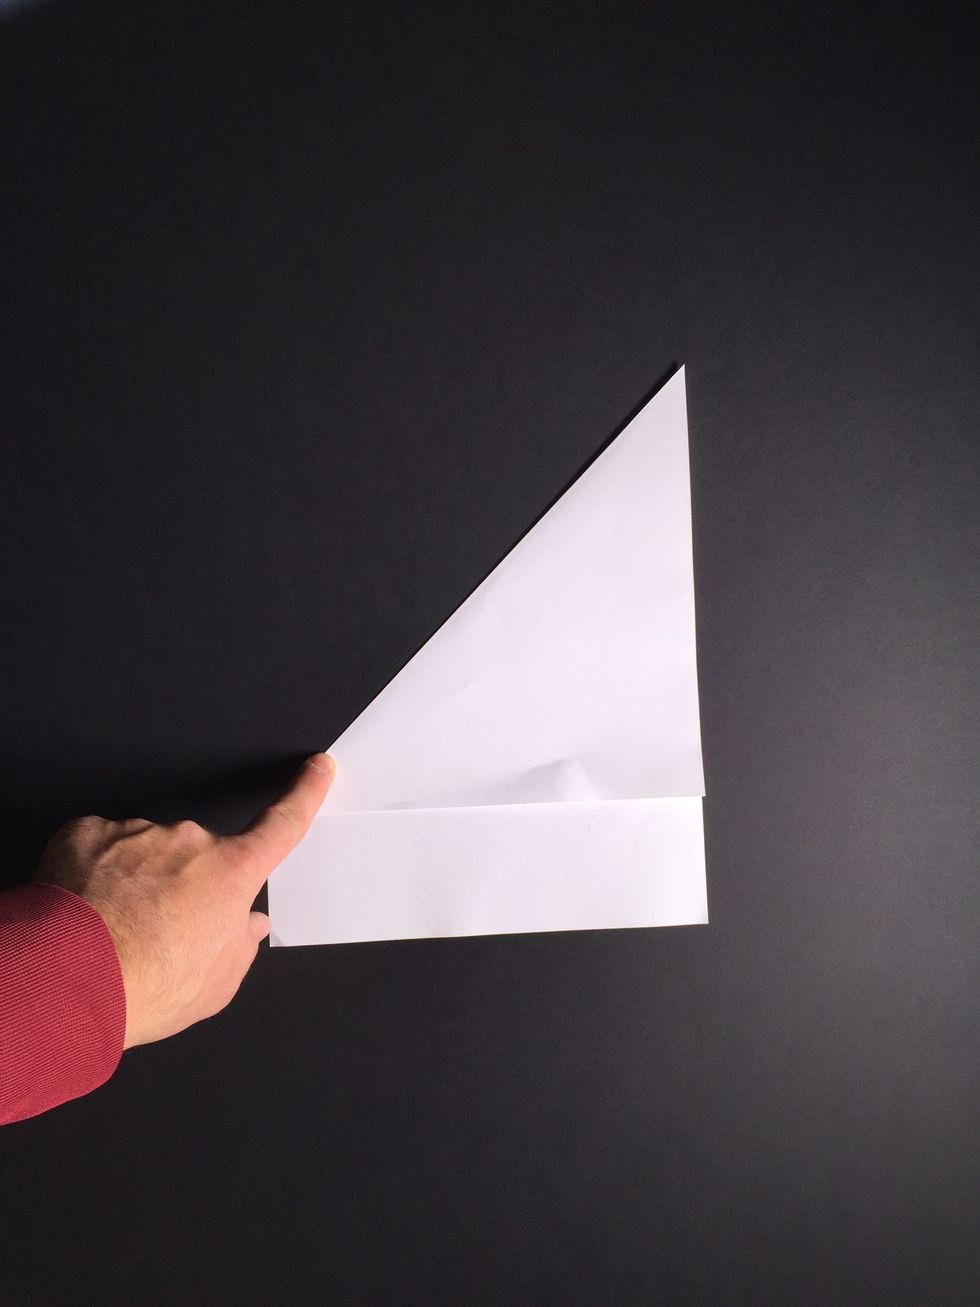
Fold over the right-hand corner.
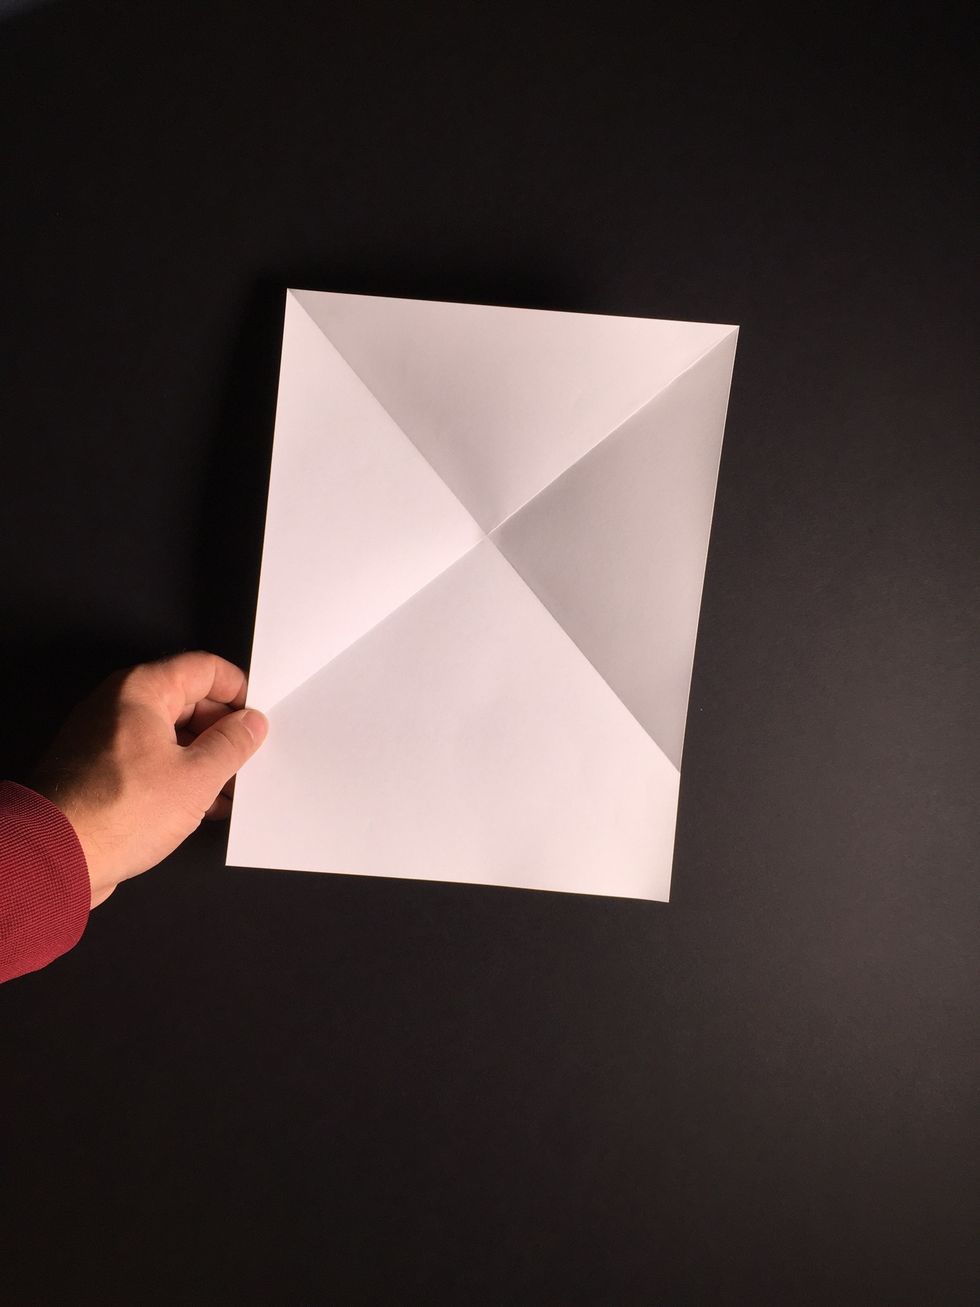
Crease. Then unfold.
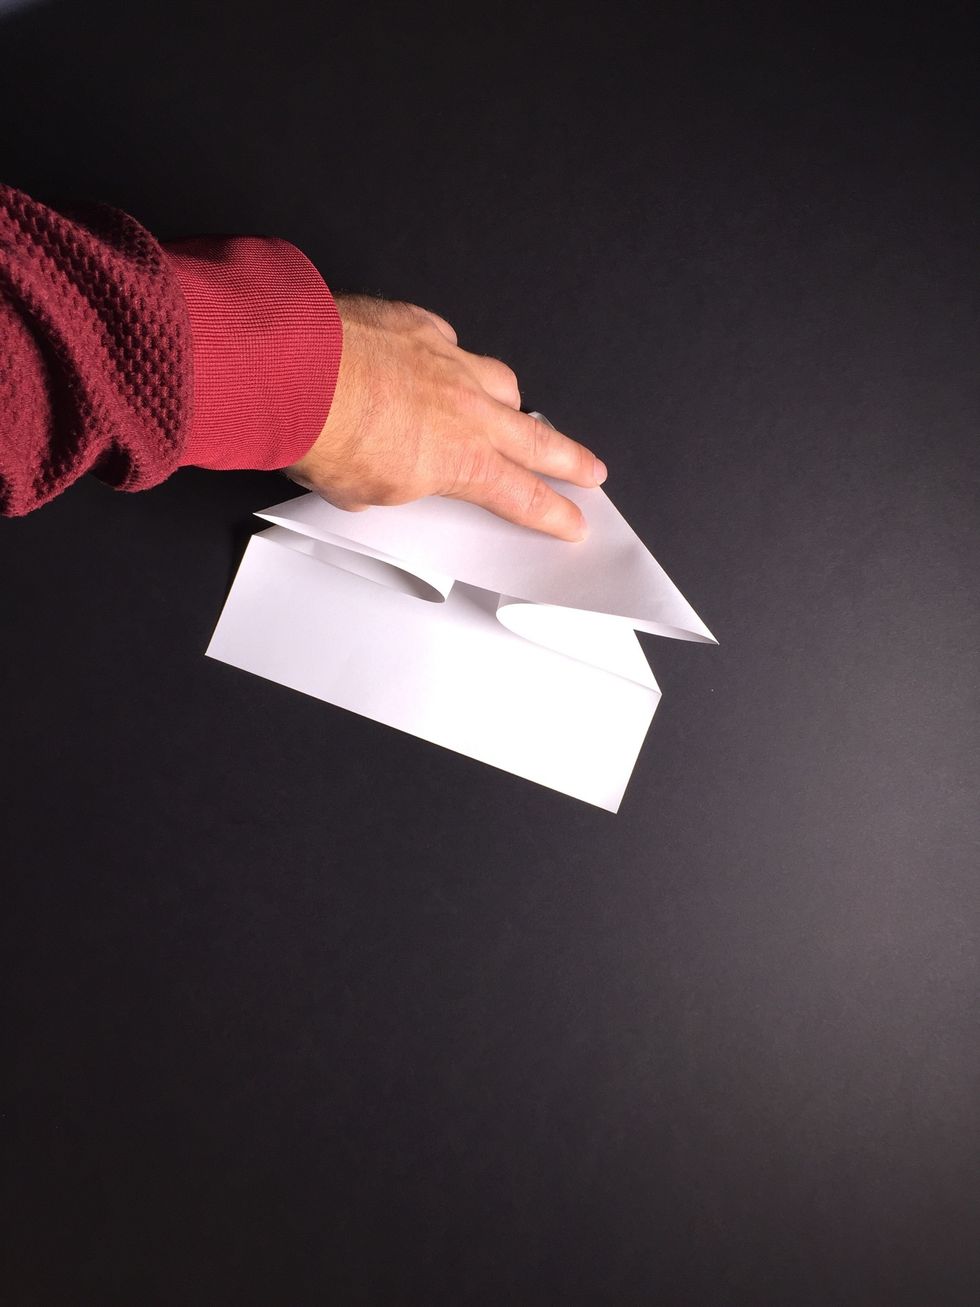
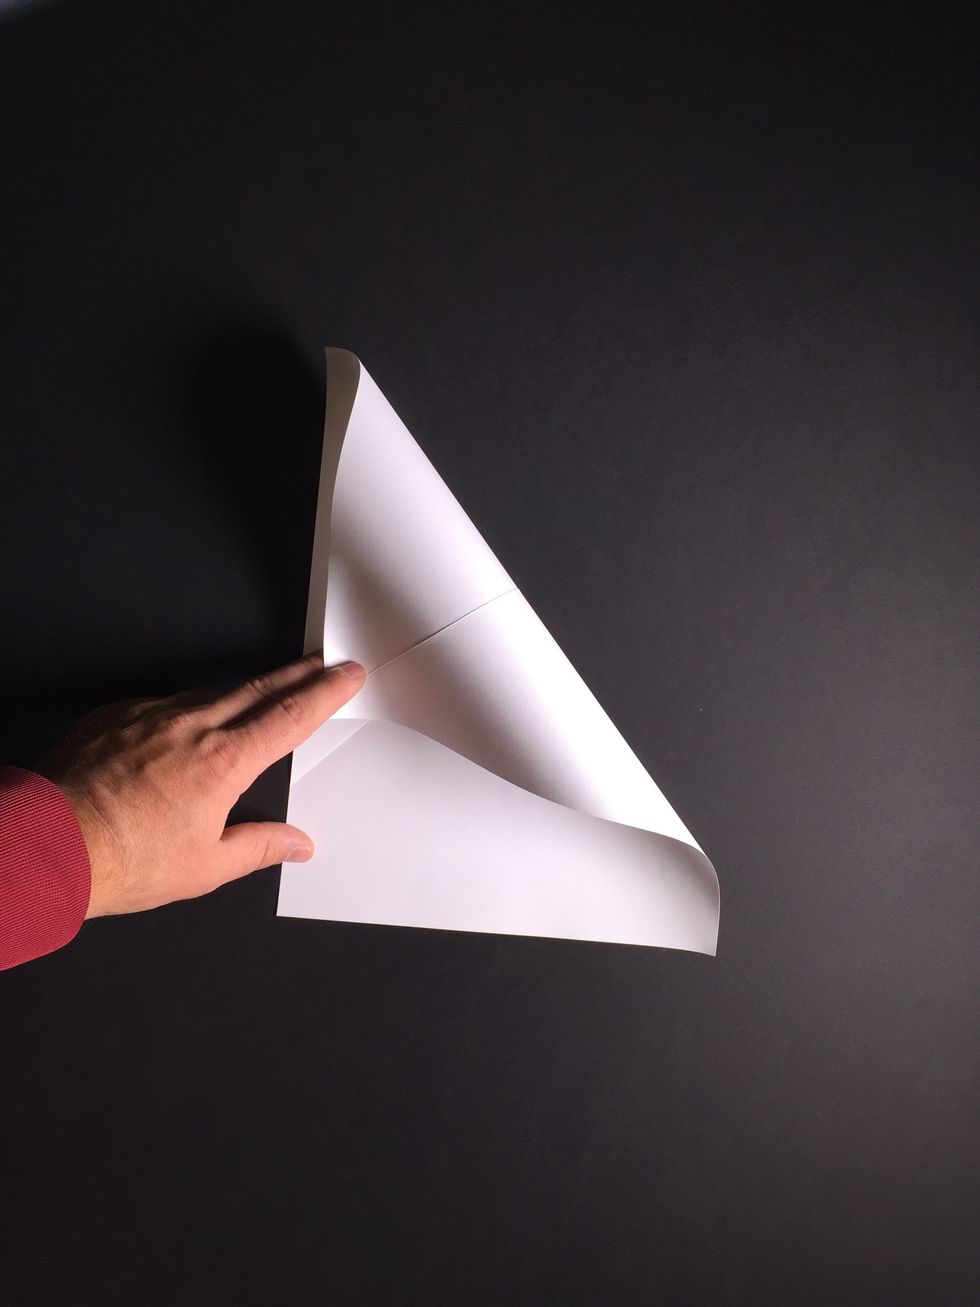
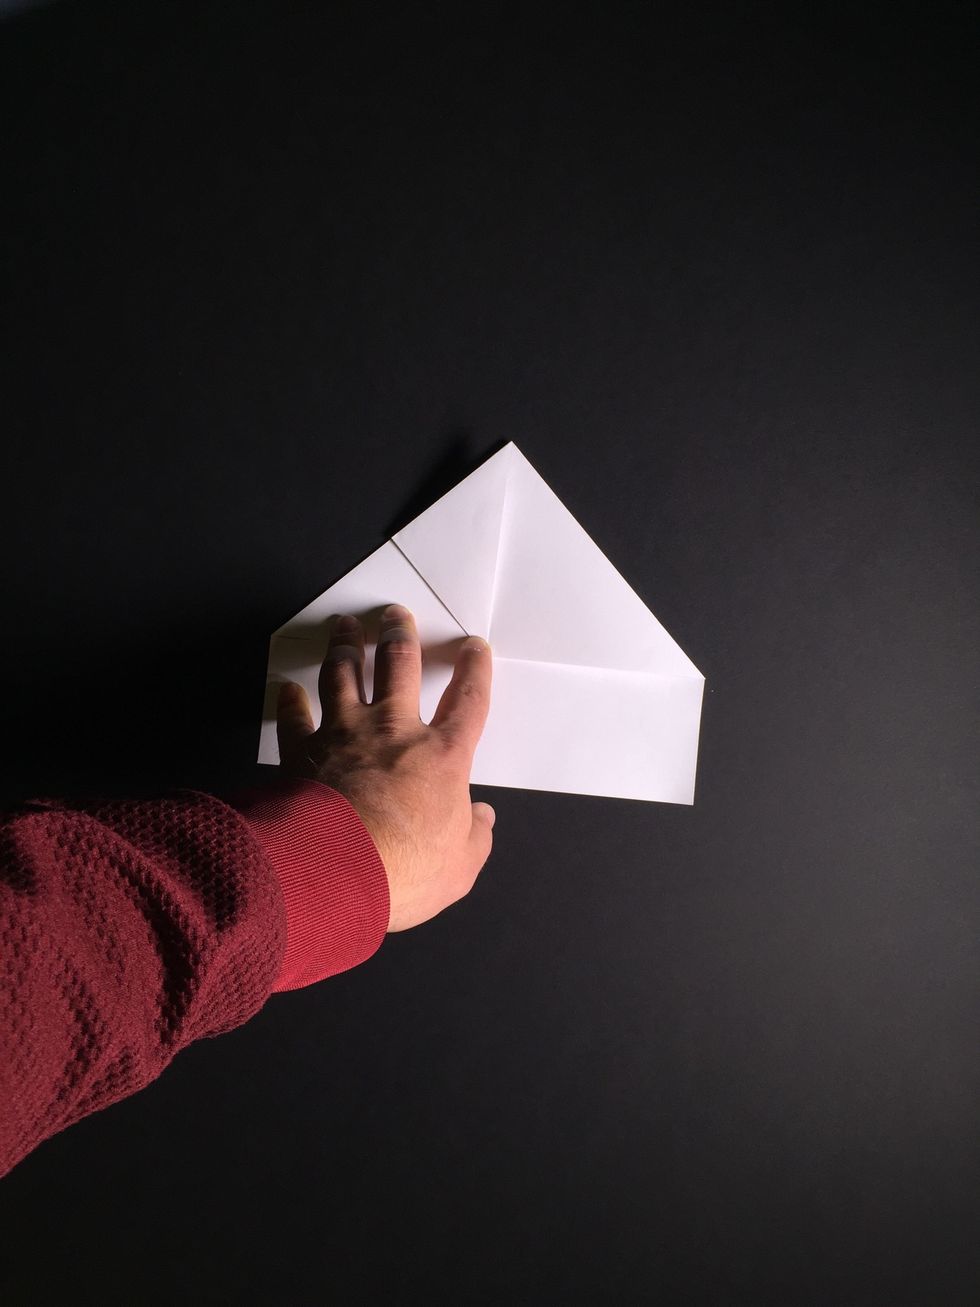
Carefully close in the sides as shown.
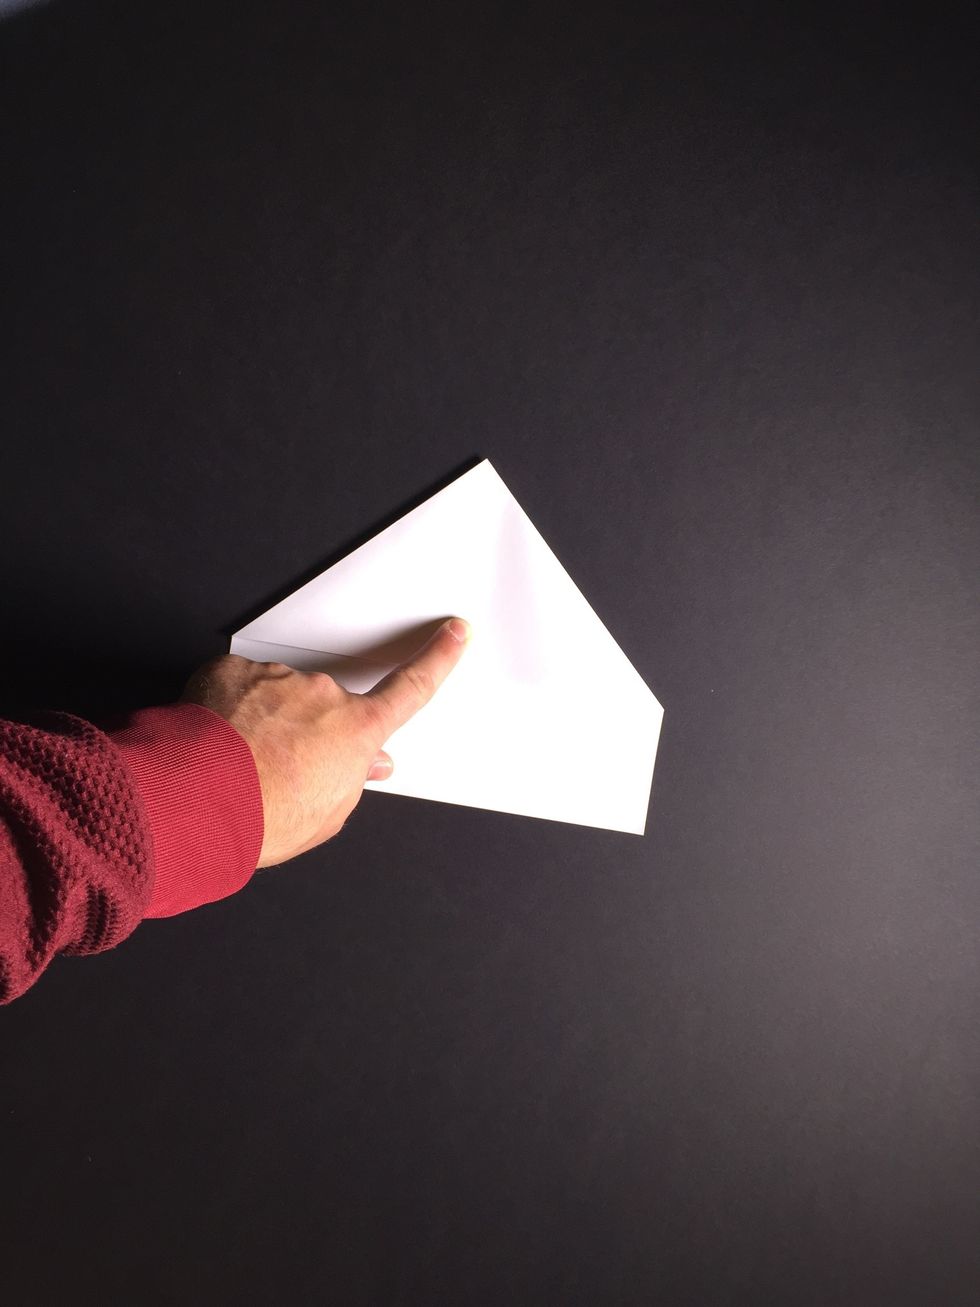
Fold down the center line from front to back.
Fold up the resulting left-hand tip as shown.
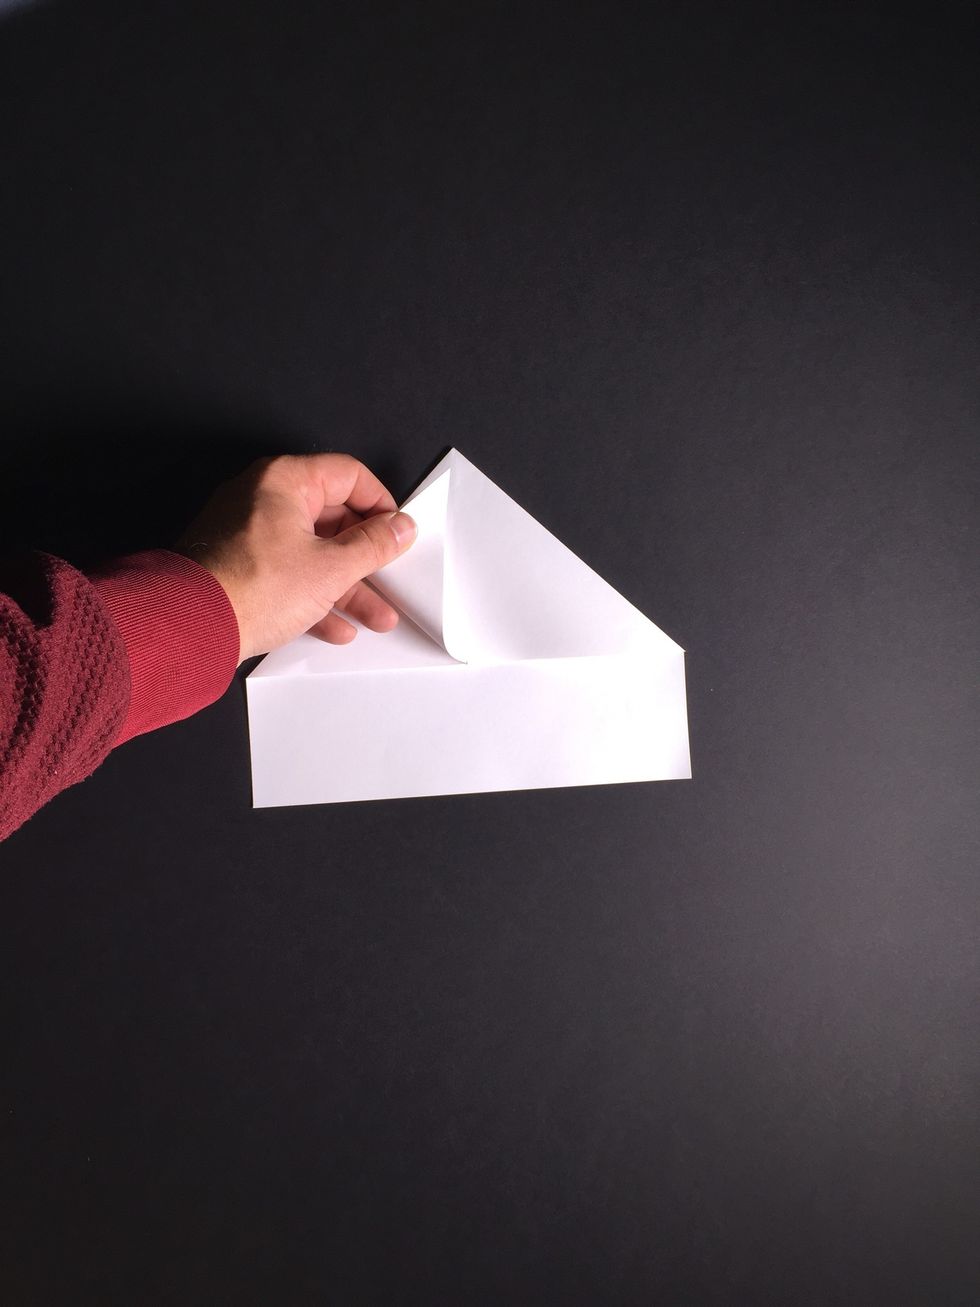
Crease along the bottom edge.
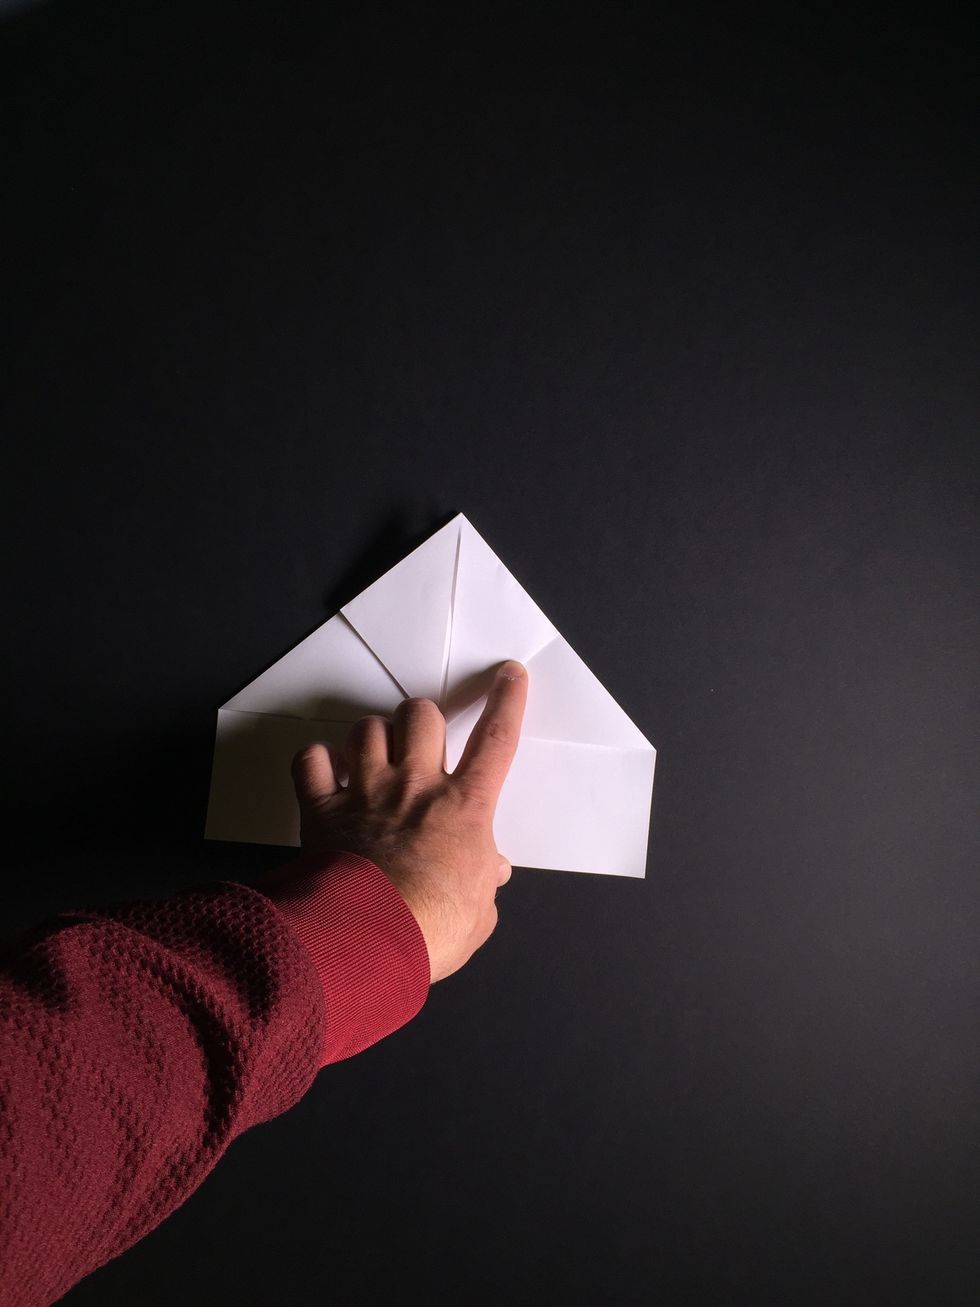
Repeat the same procedure on the right section.
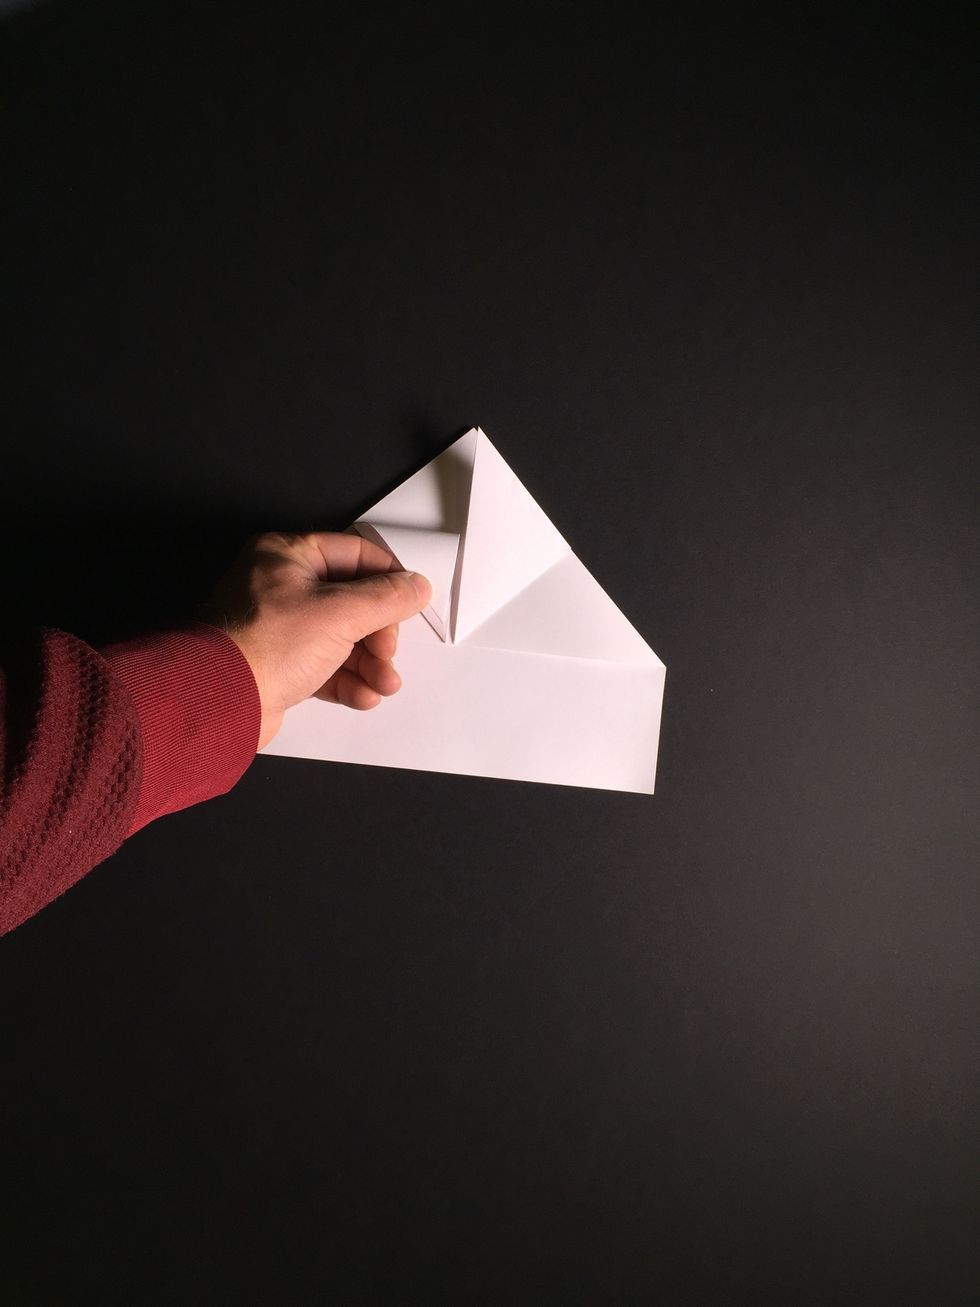
Fold back the left-hand point.
Crease.

Repeat the same procedure on the right panel.
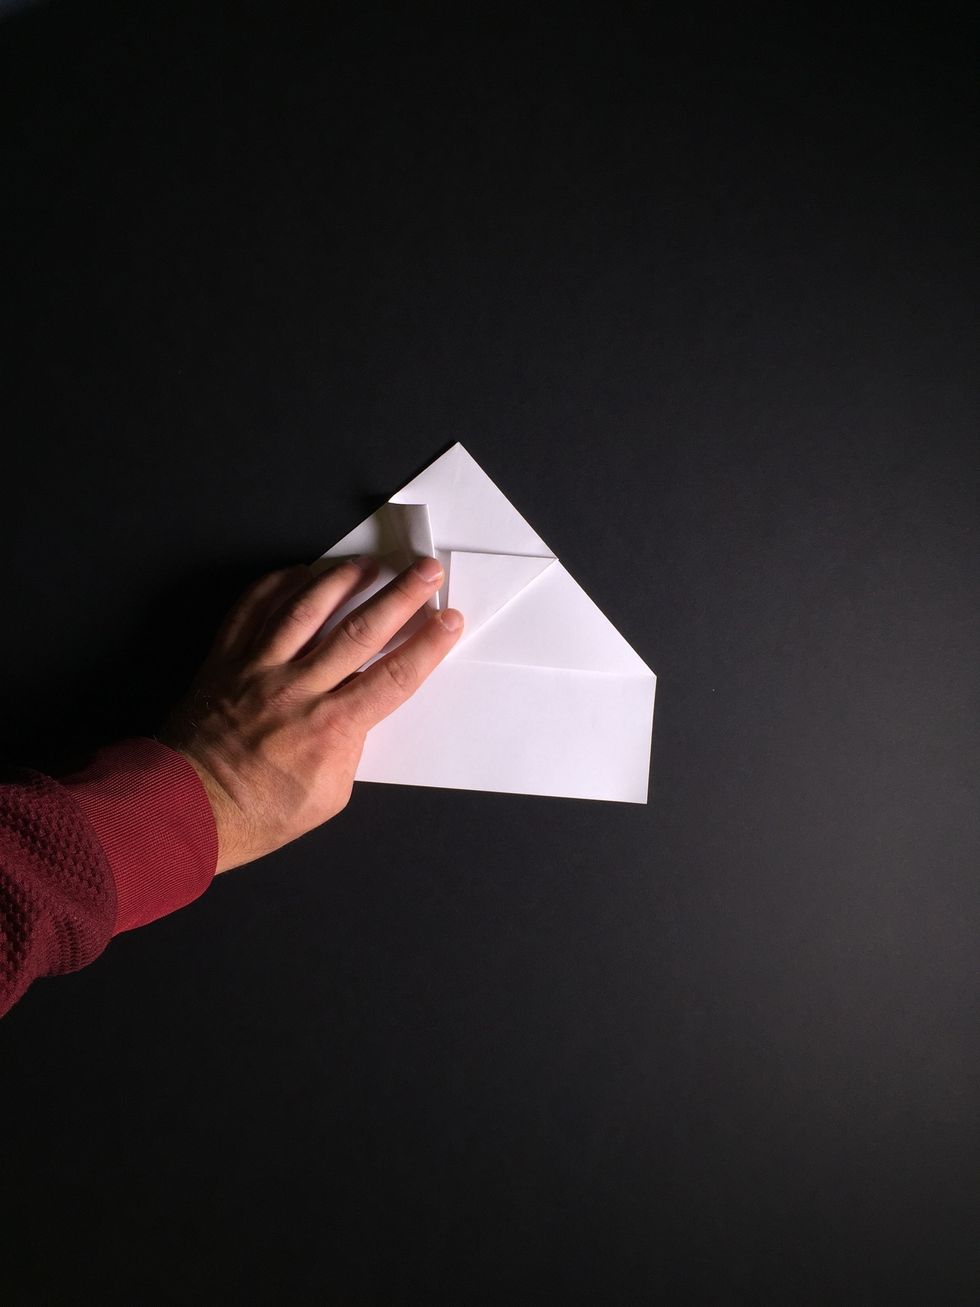
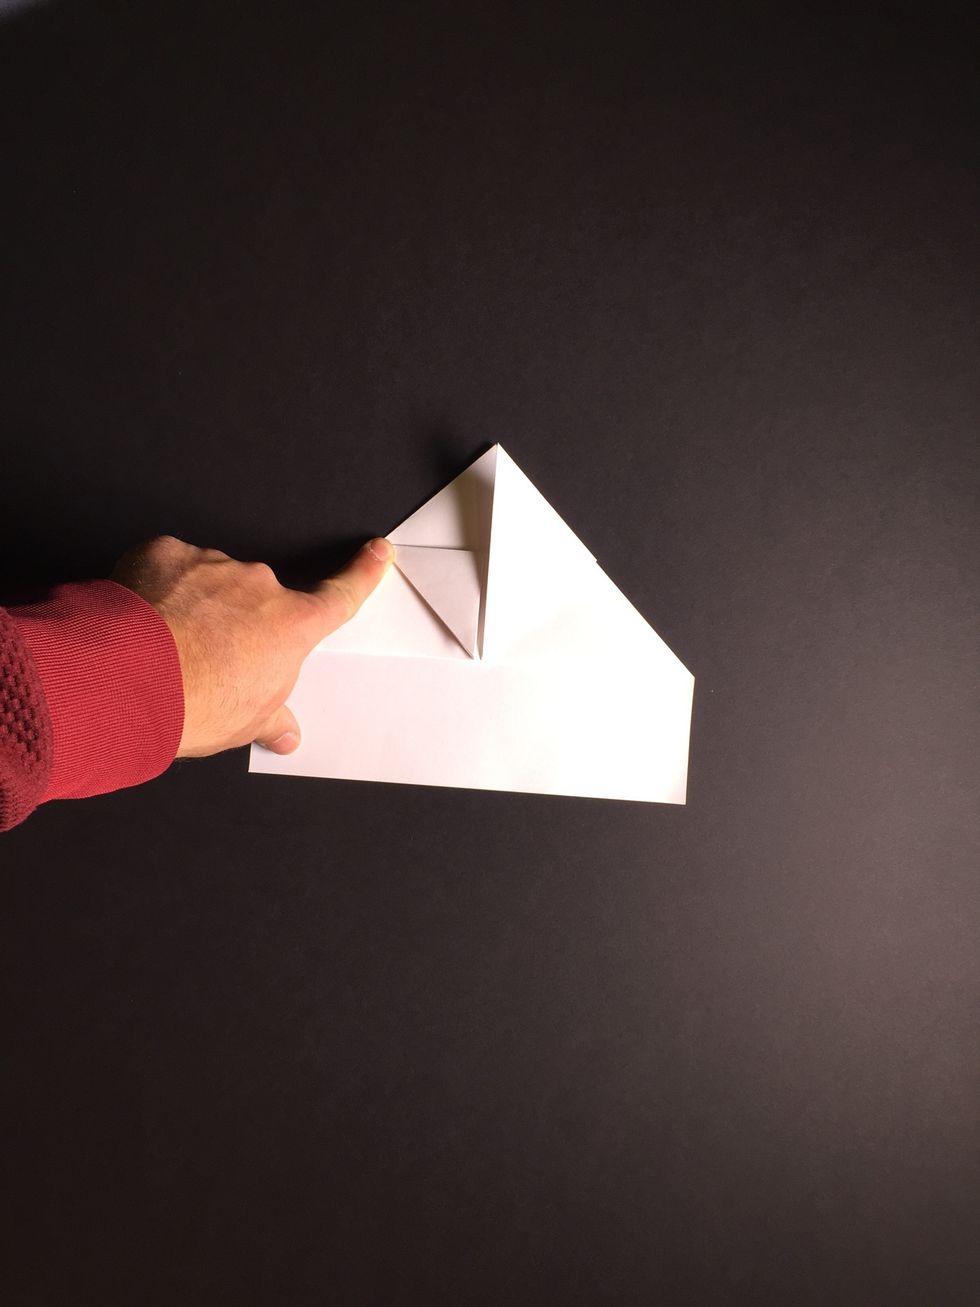
Bend the left panel as shown.
Crease from back to front only 2/3 of the way.
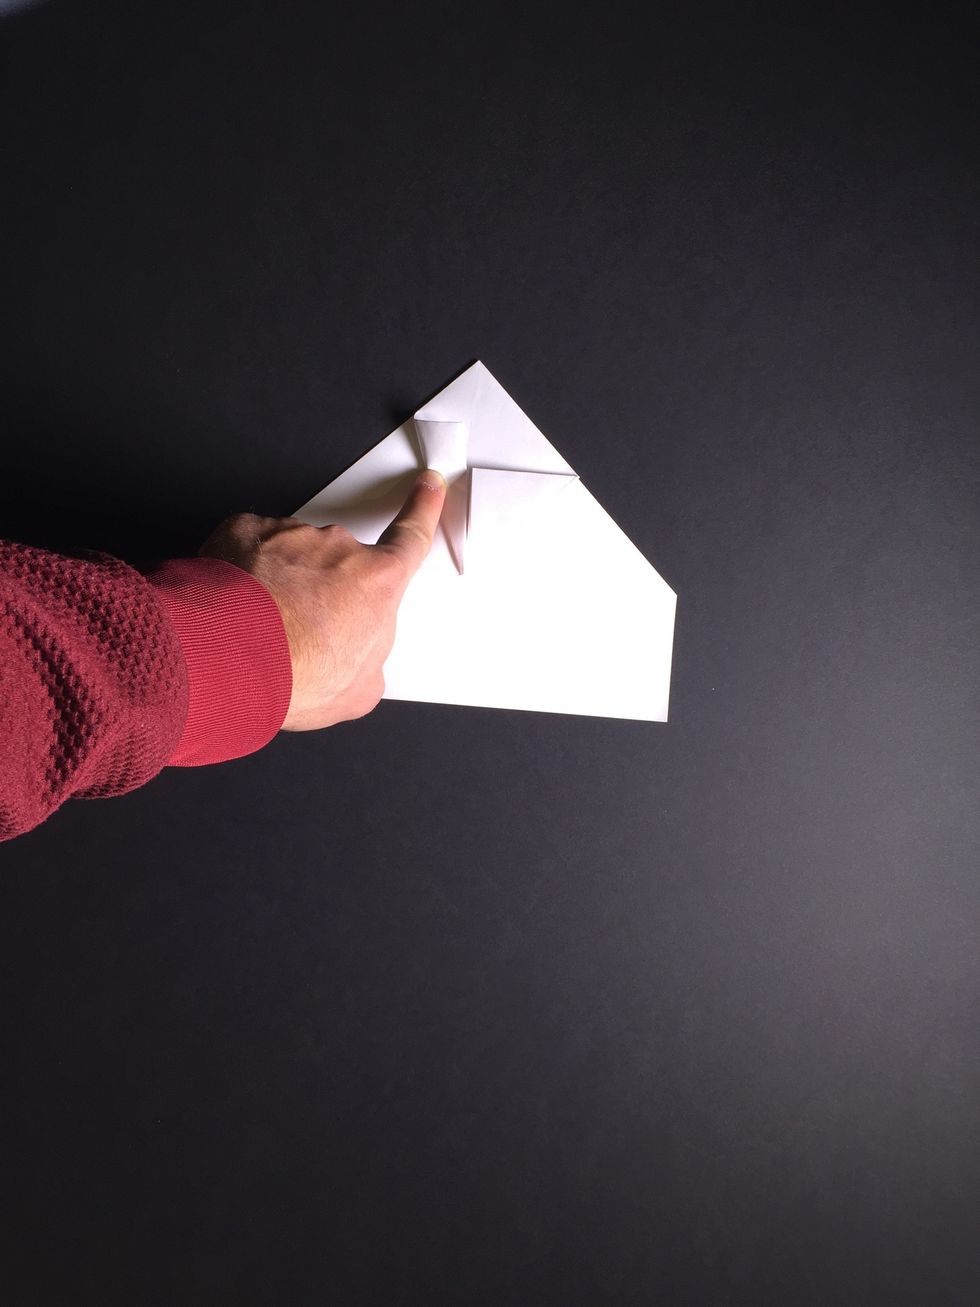
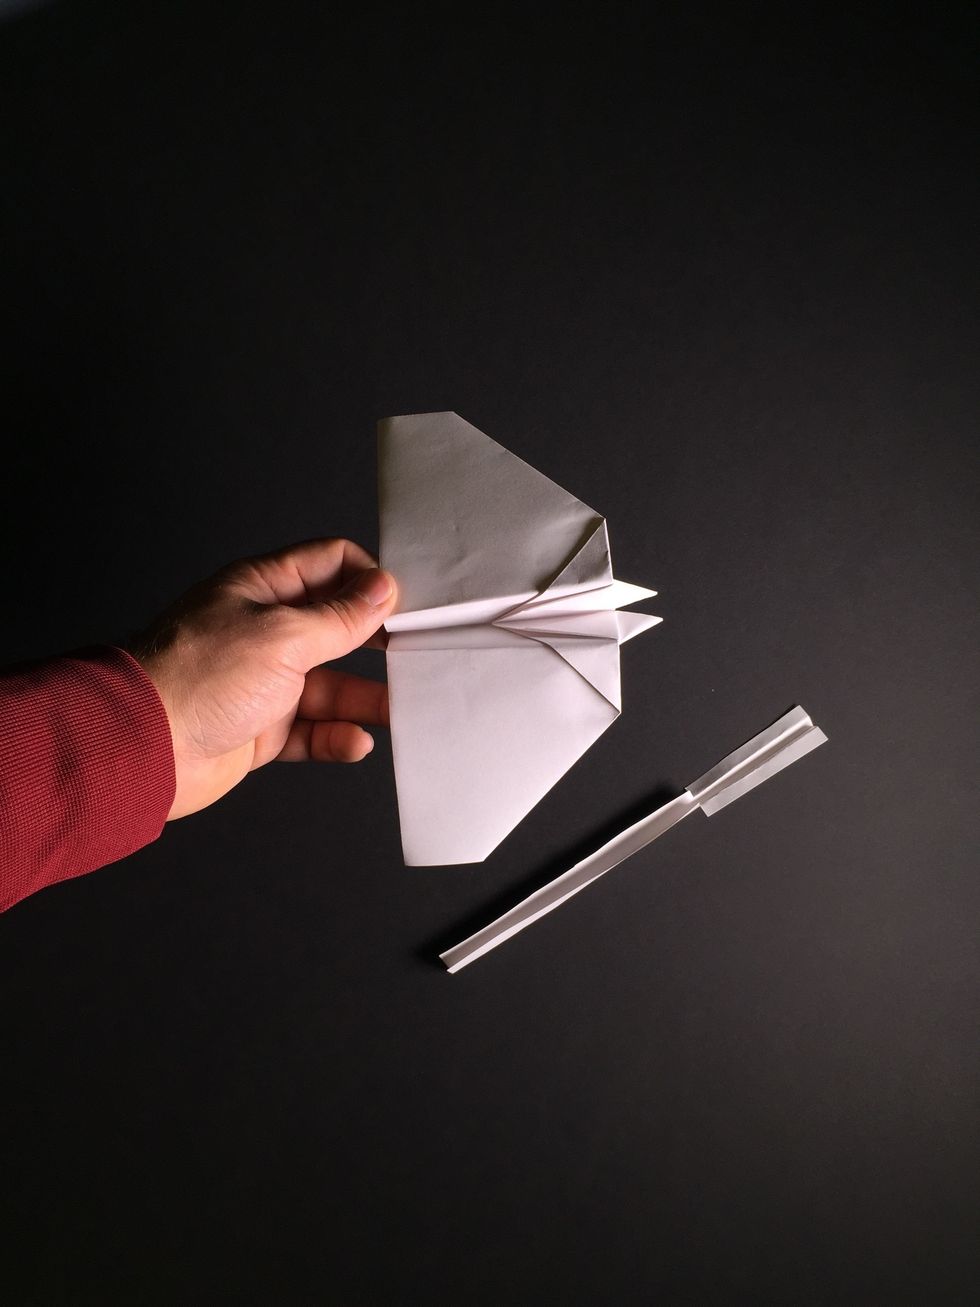
Study the photos from steps 16 and 17. Duplicate them as shown in the photos by tucking the top left flap into the previous 2/3 crease.
Repeat the folds on the right.
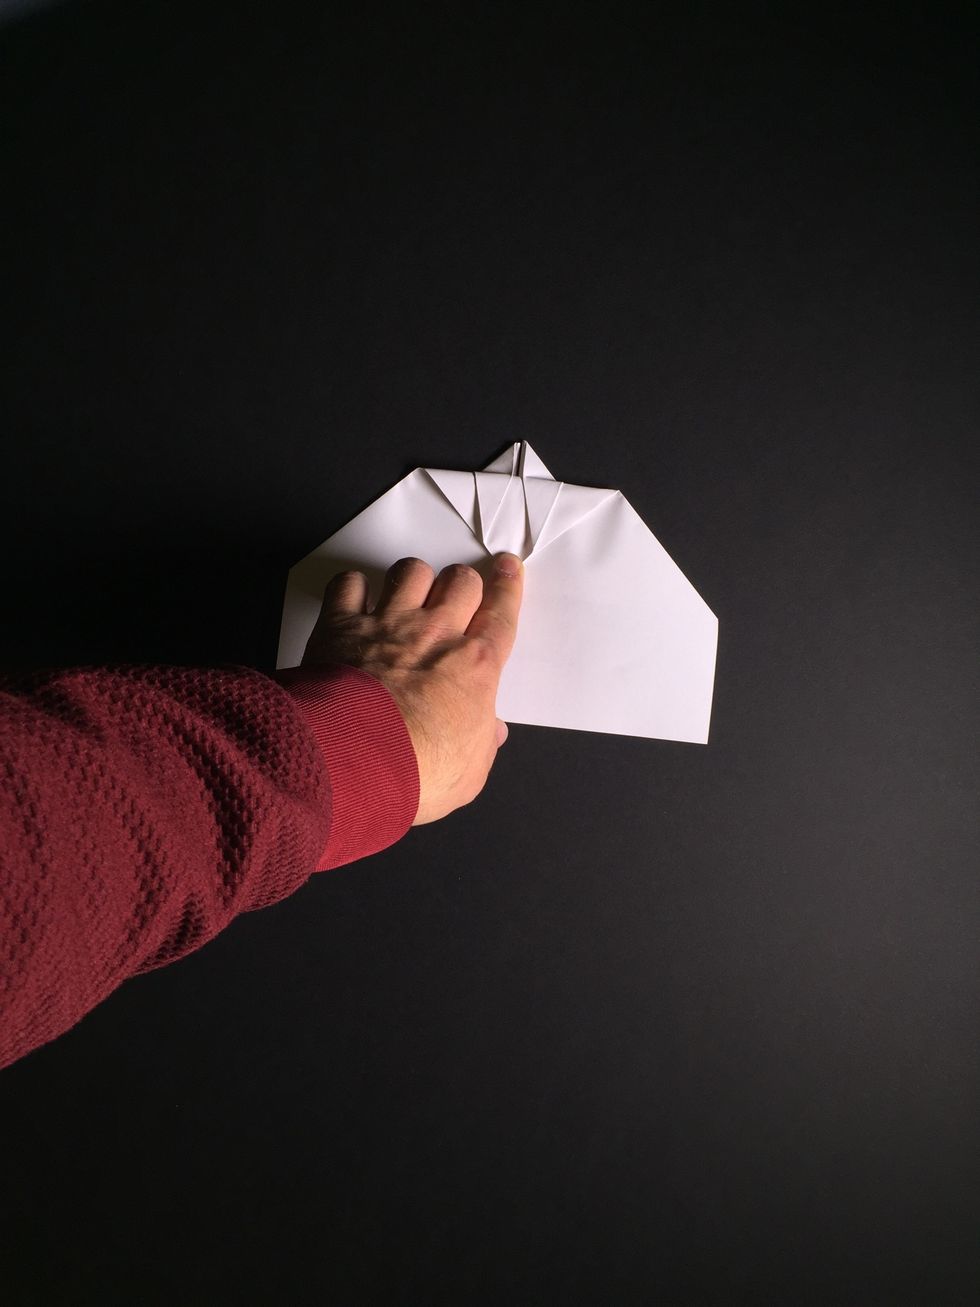
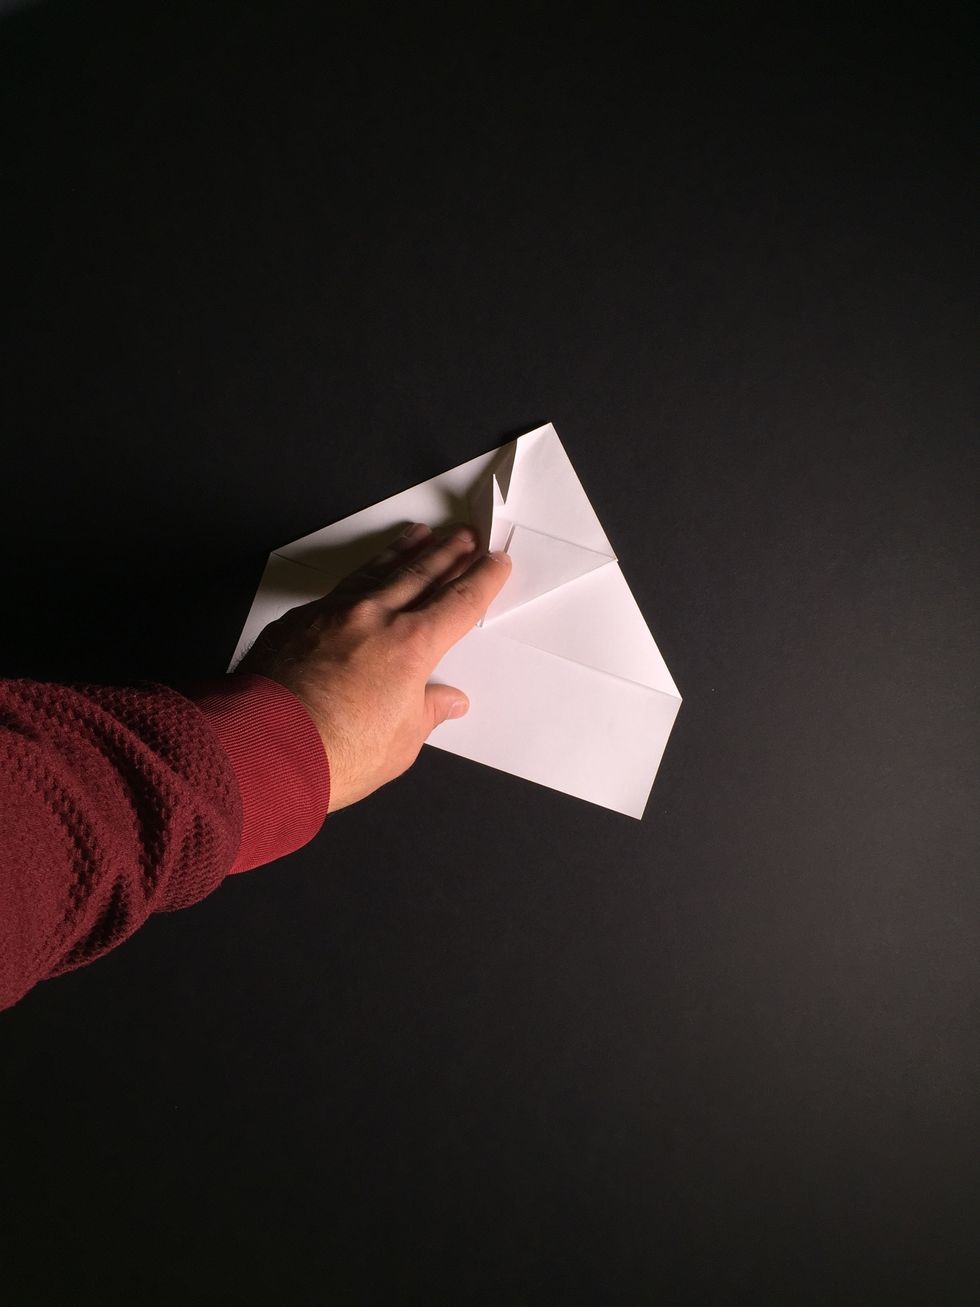
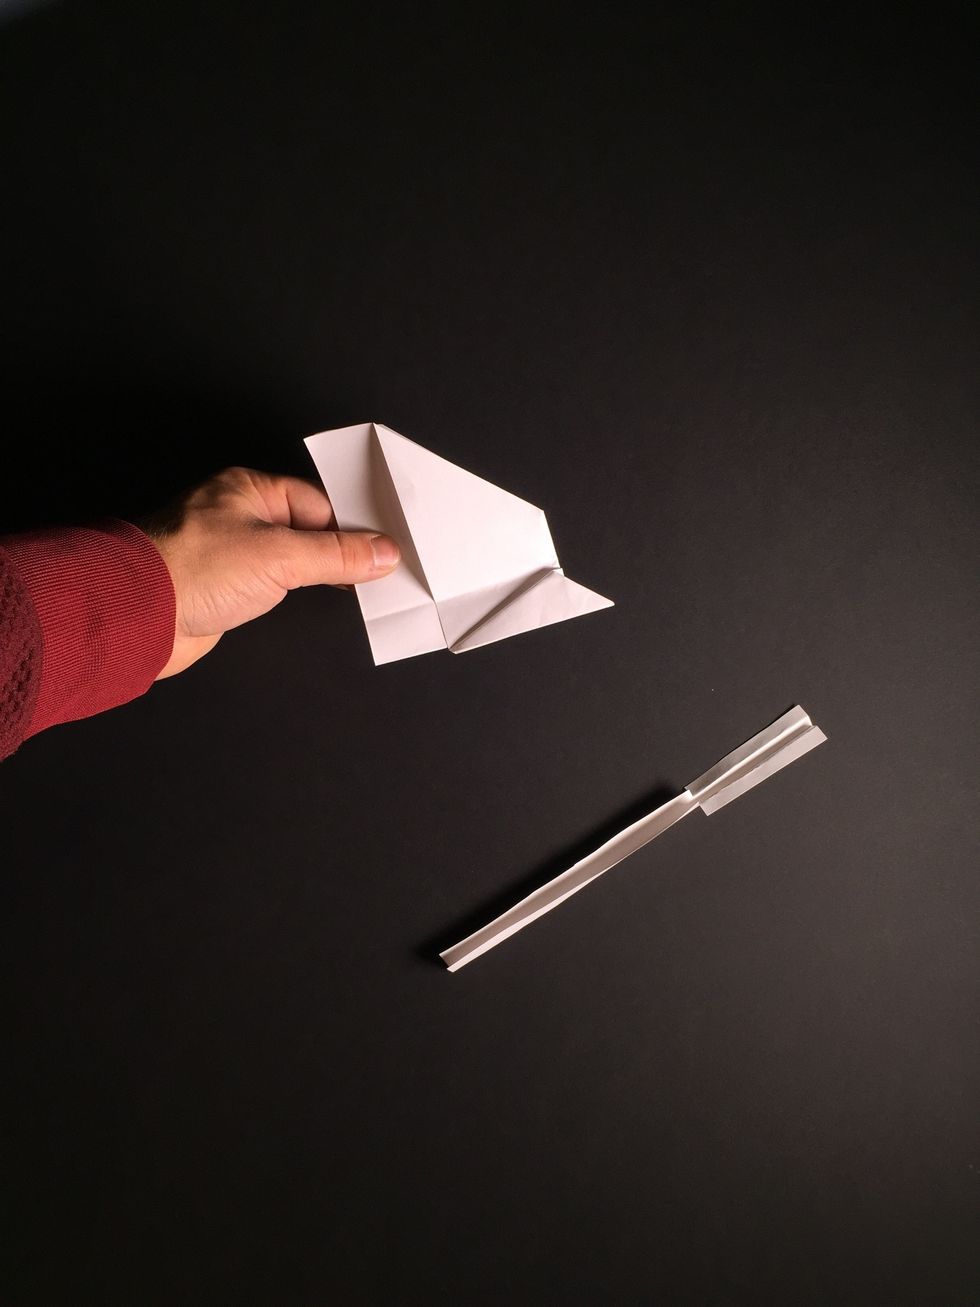
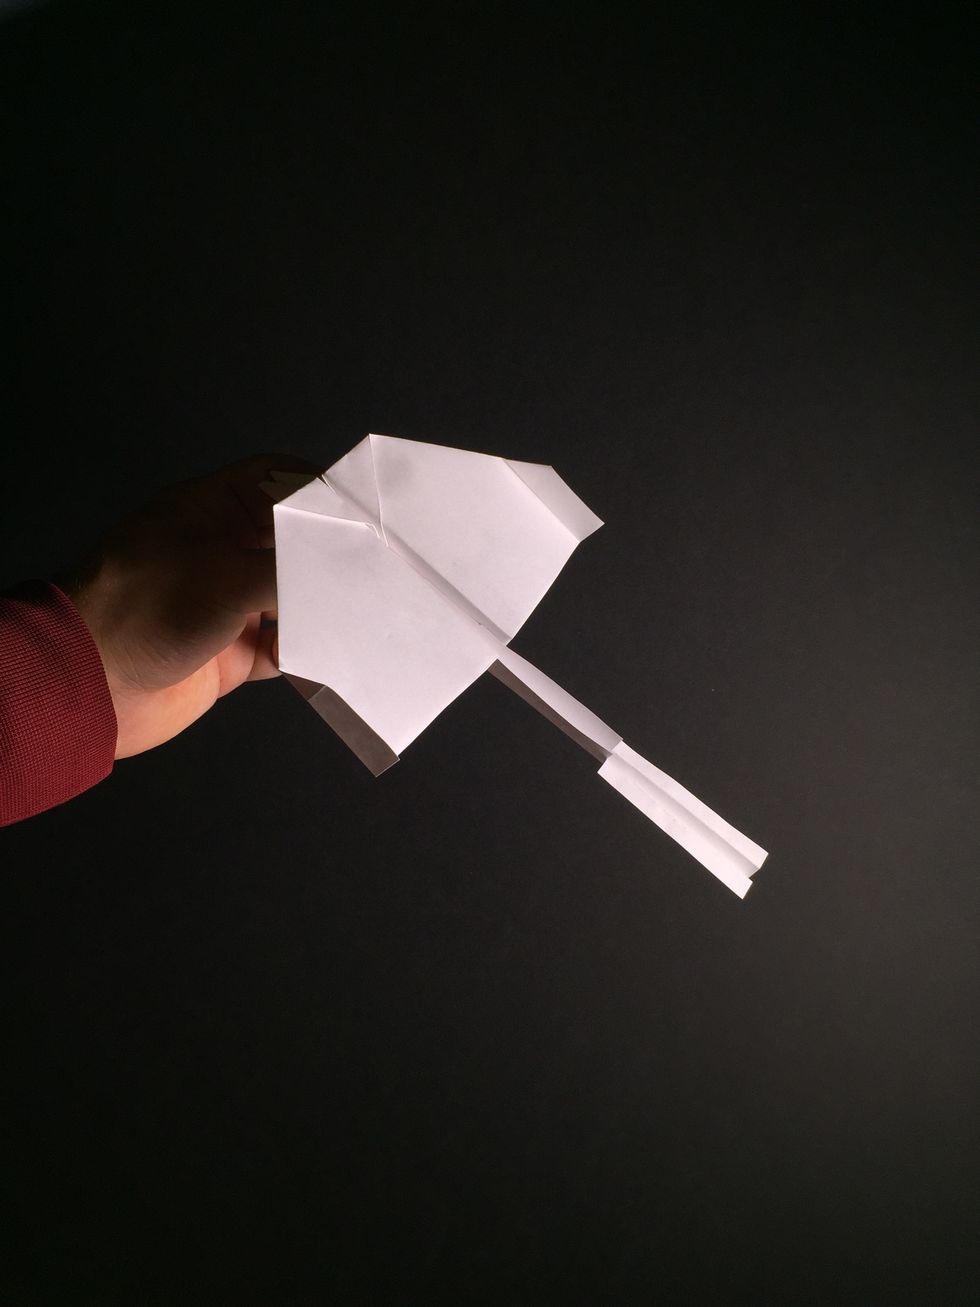
Turn the plane over and fold the point back and crease as shown.
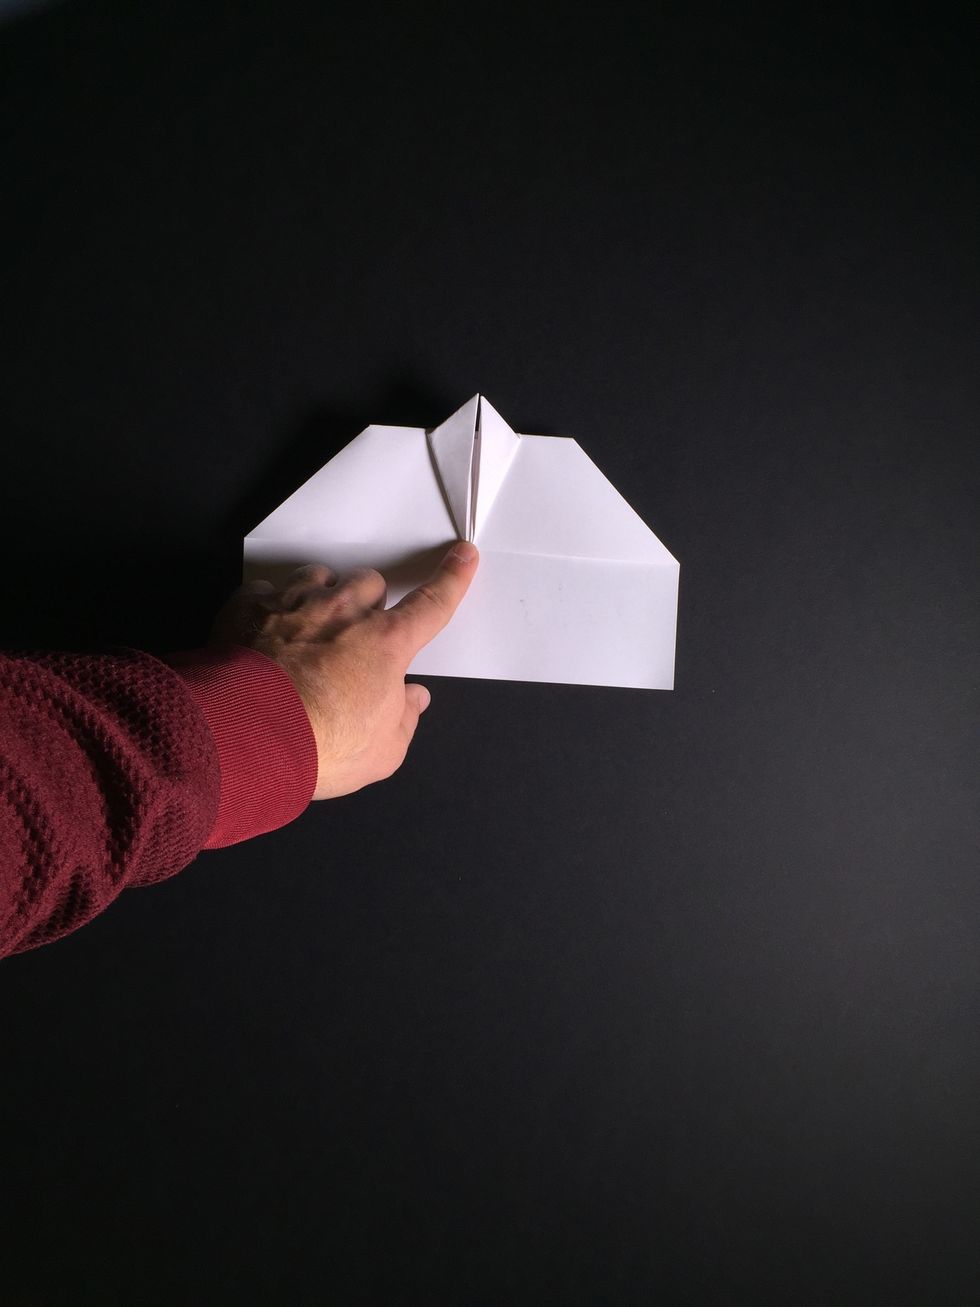
Turn the plane over again. The result should be similar to the photo.
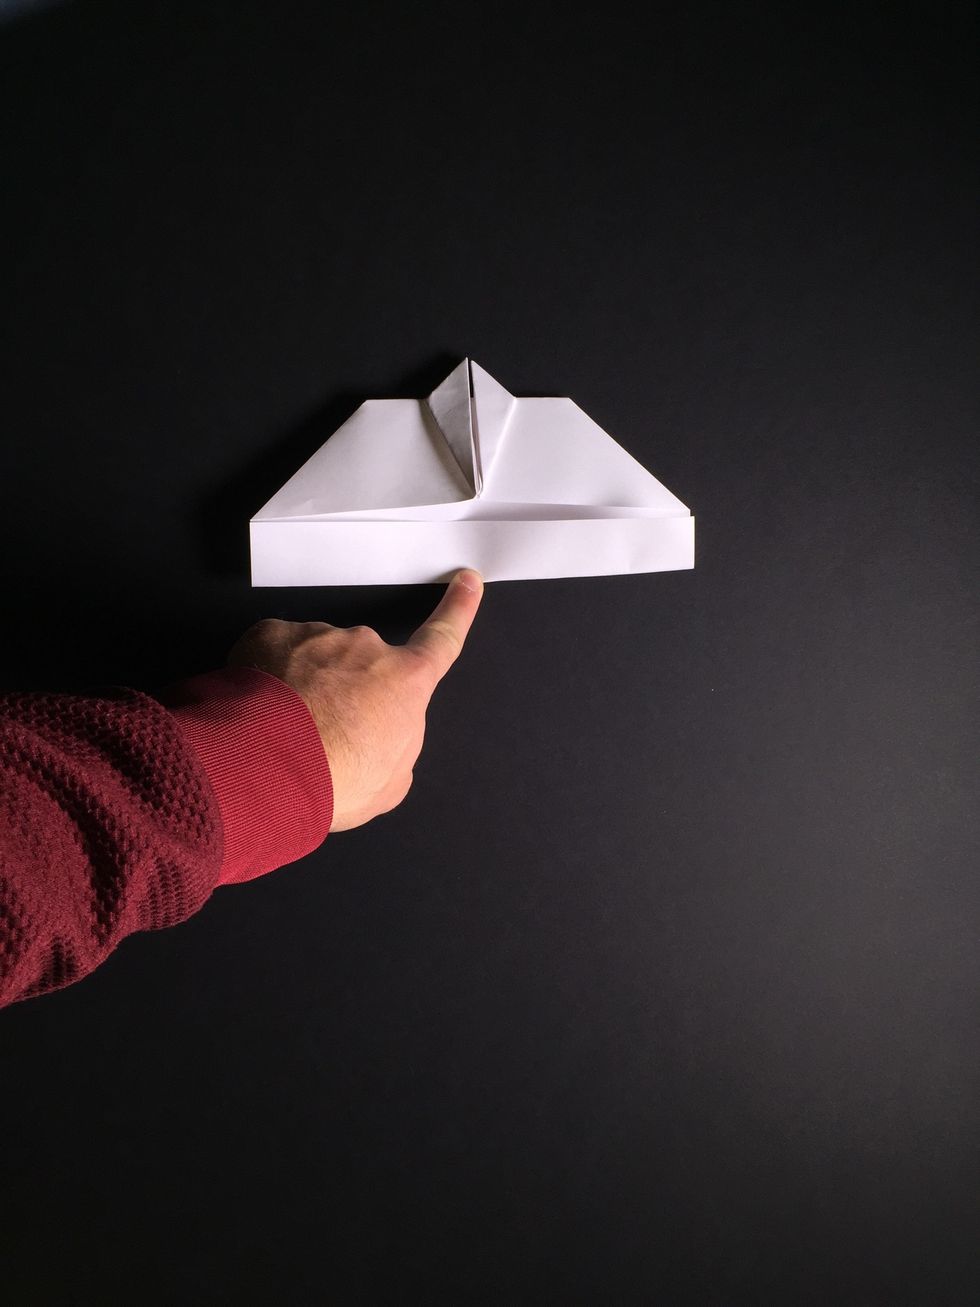
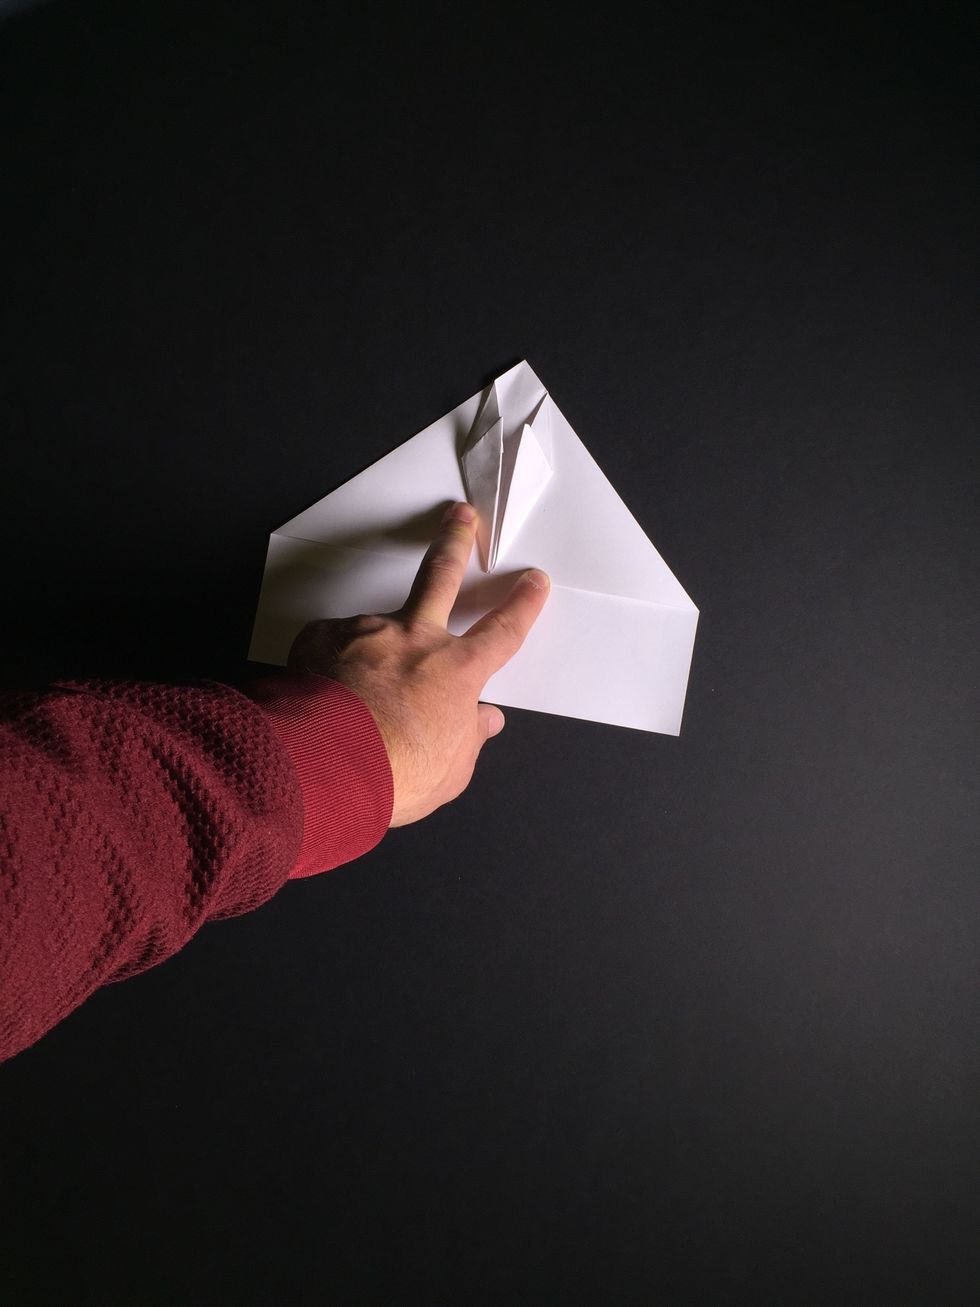
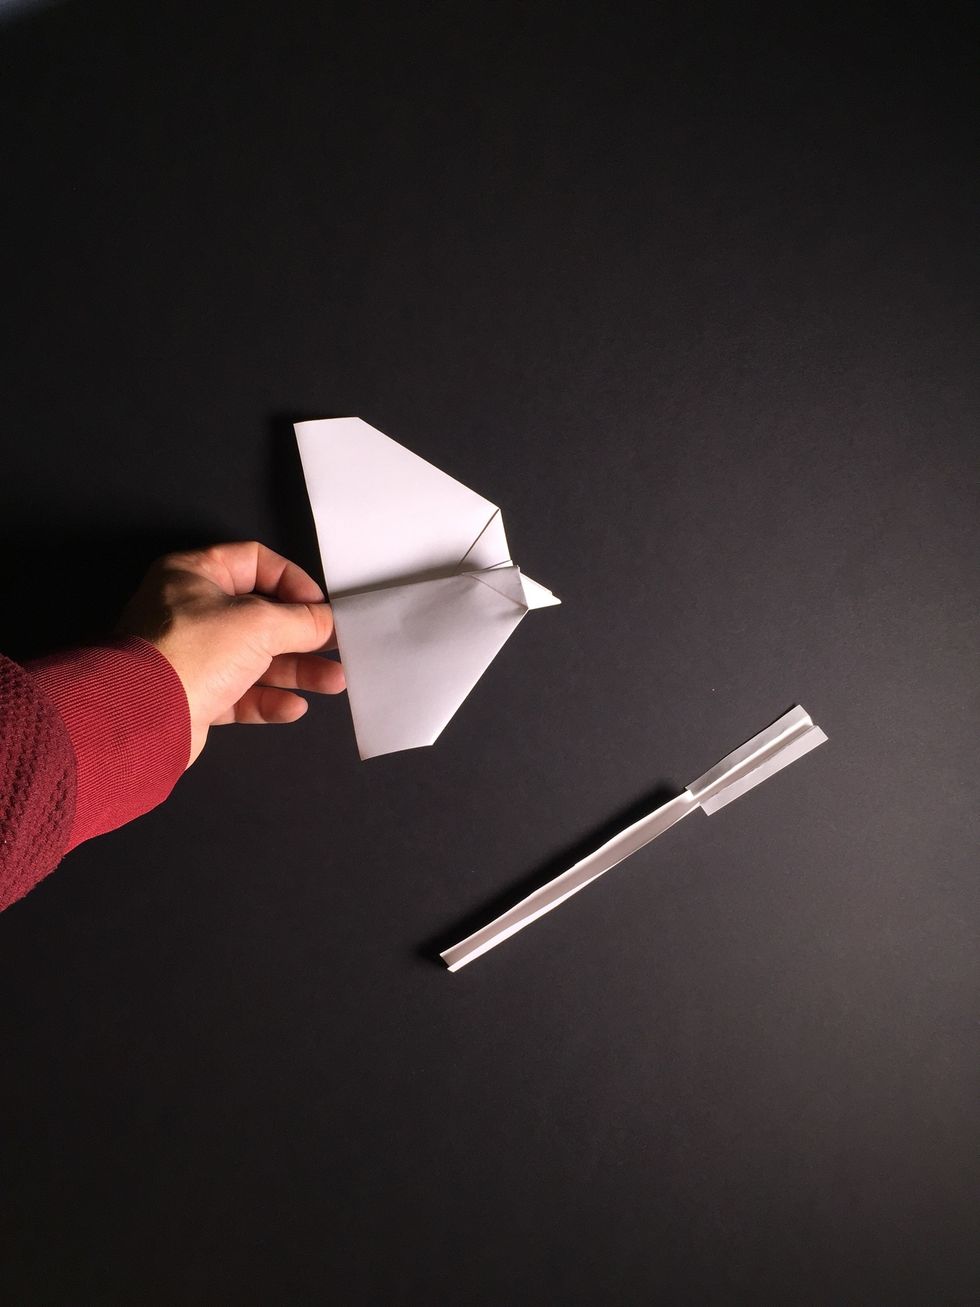
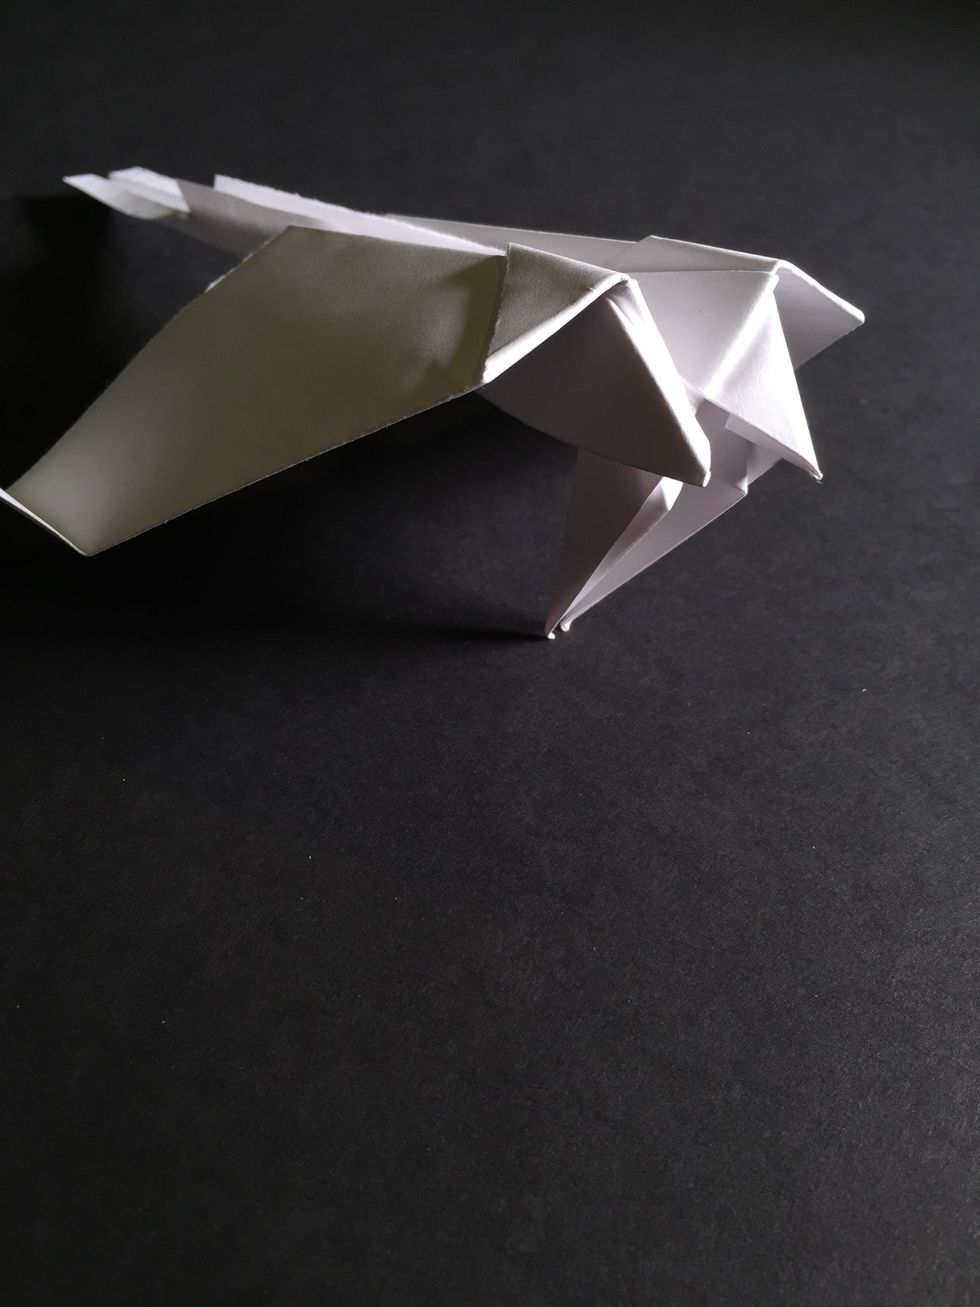
Crease wing as shown.
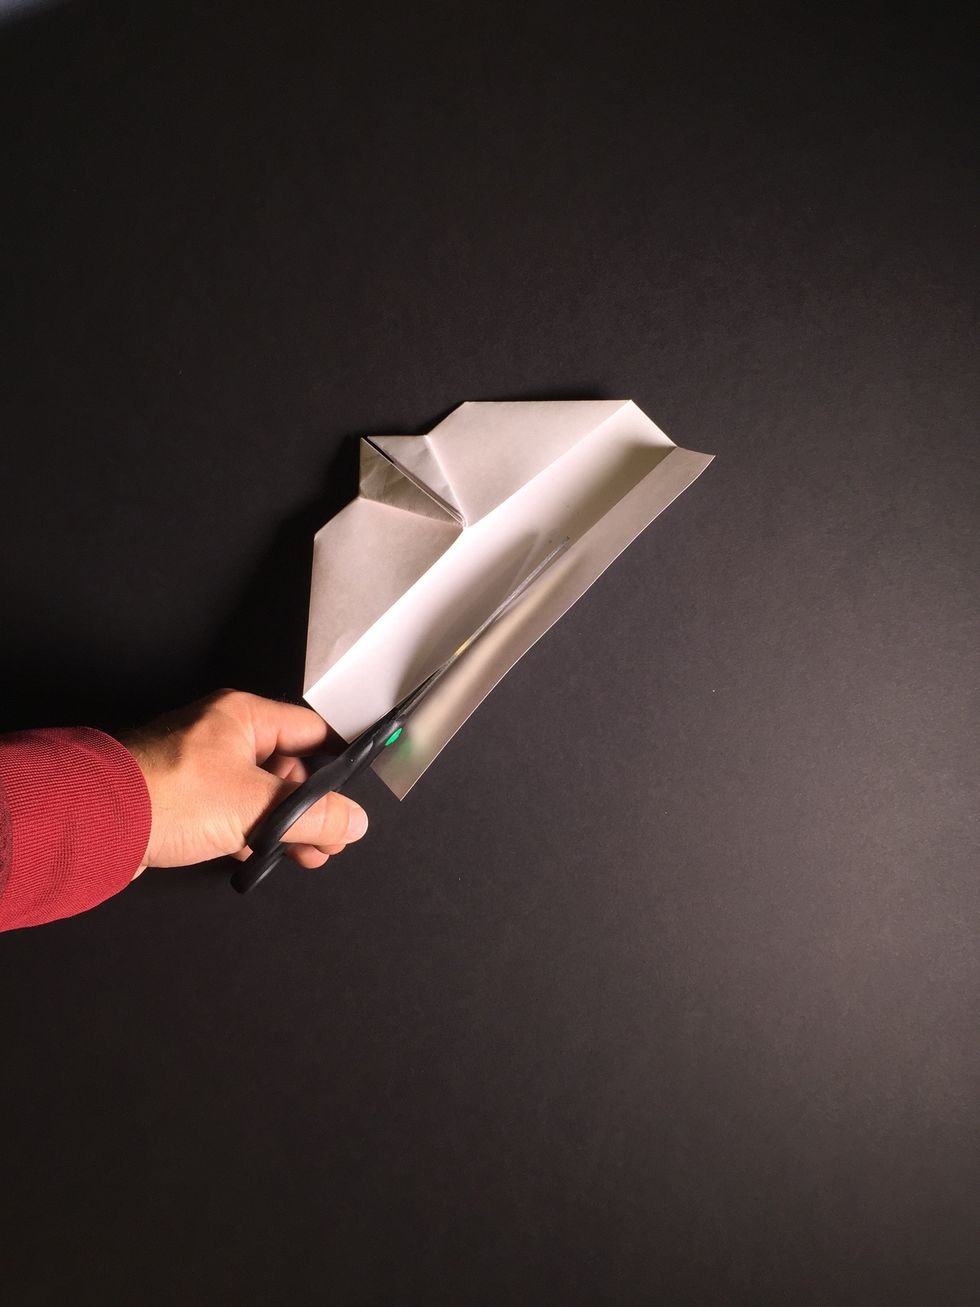
Use scissors to cut along the crease, or moisten the crease to easily tear off the back of the wing.
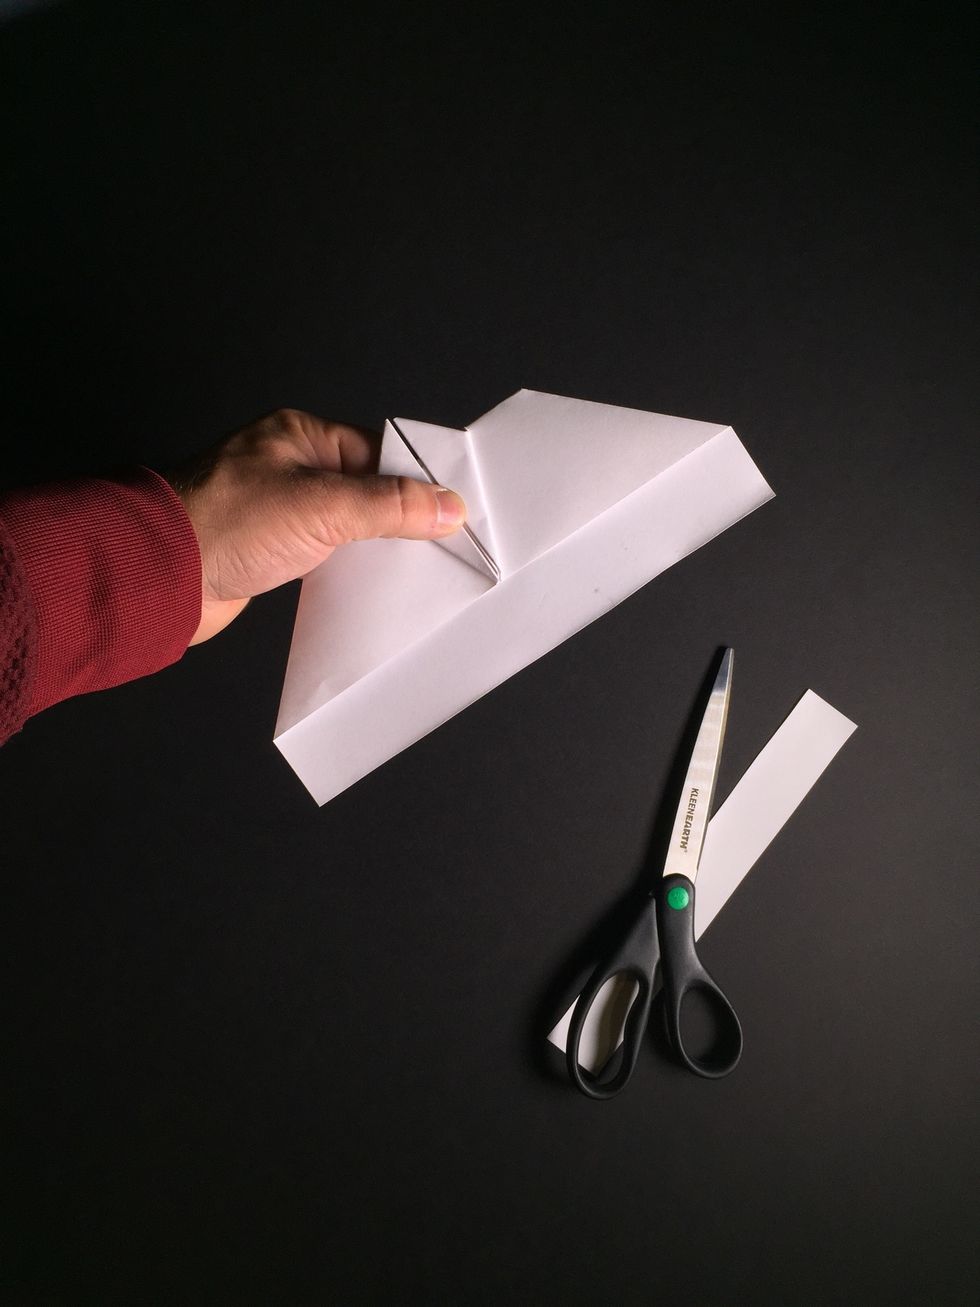
Carefully tear or cut off the strip of paper. SAVE THE STRIP of paper because you are going to need it to make the tail.
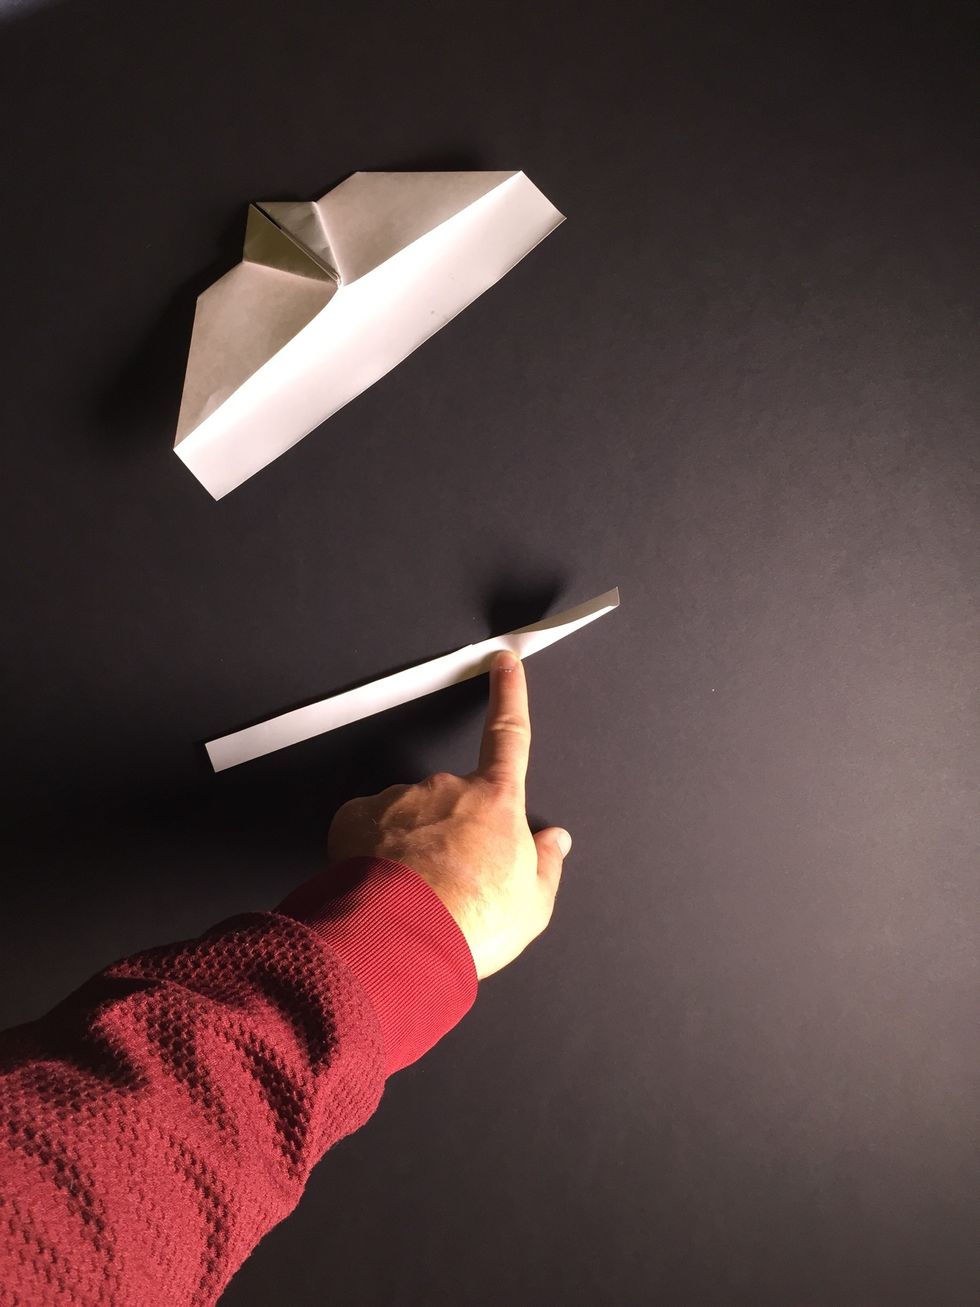
To make the tail, fold down the center of the strip of paper to form a trough.
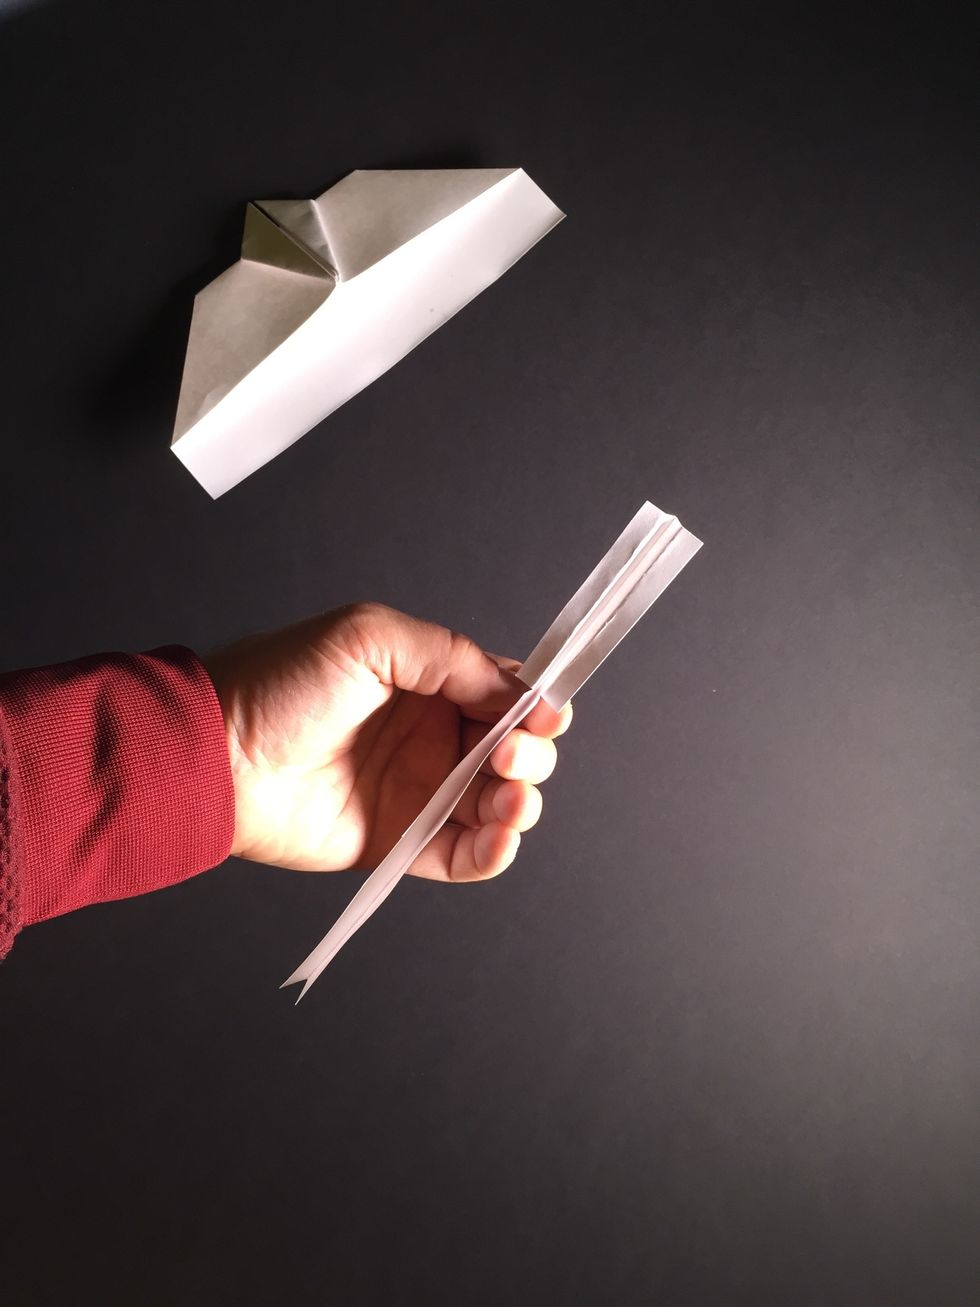
Tear or cut as shown to form control surfaces. The folds should be parallel with the bottom of the trough.
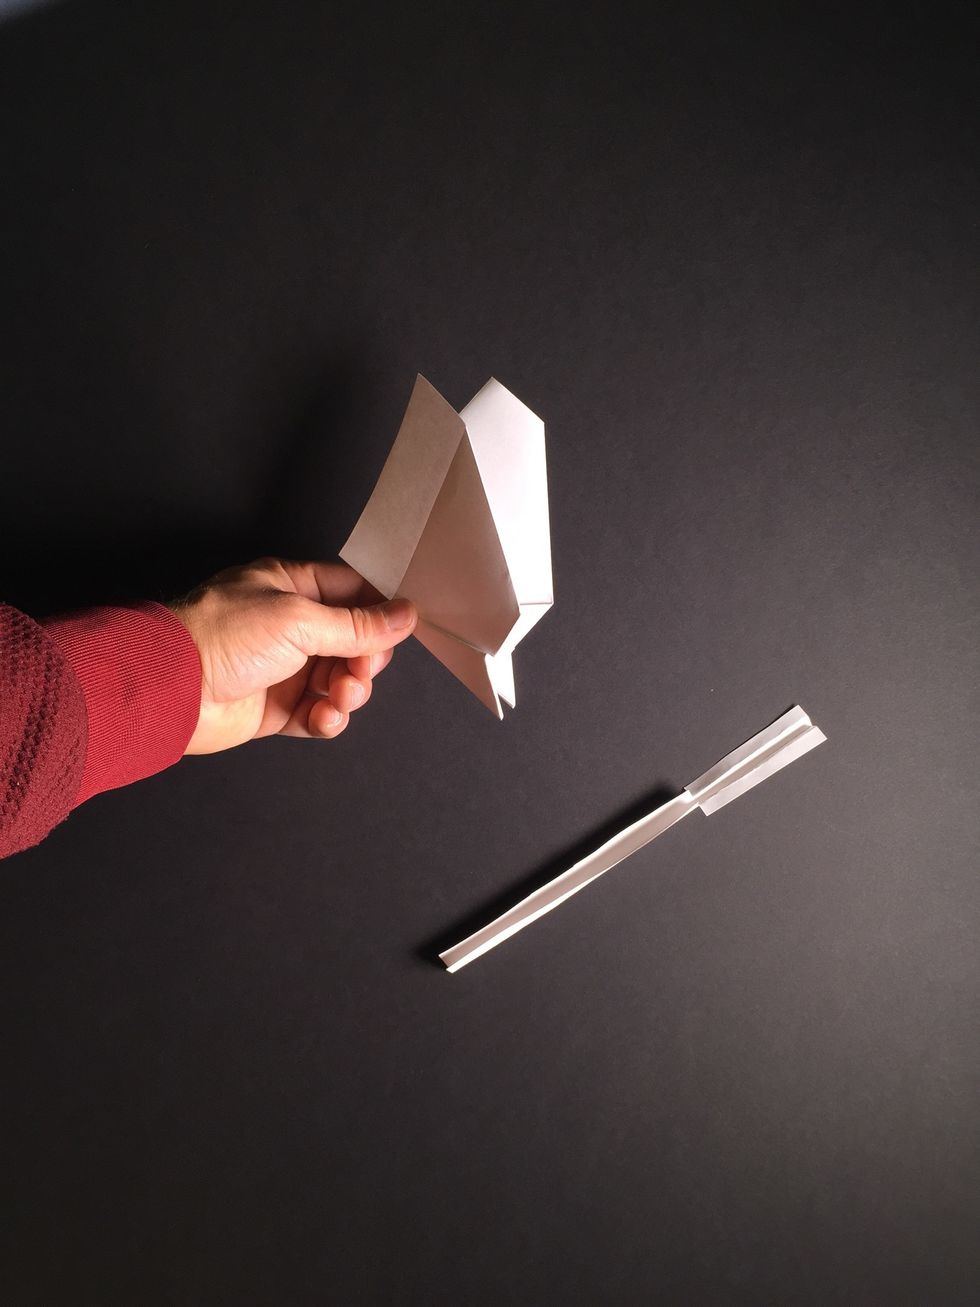
Fold wings up.
Fold the right wing down as shown in photos 26 and 27. Take special care to angle this fold in such a way so that the leading edge of the wing is slightly higher than the trailing edge.
Look at the photo and you’ll see that the fold isn’t perfectly parallel with the trough at the bottom but slightly angled as described in photo 26.
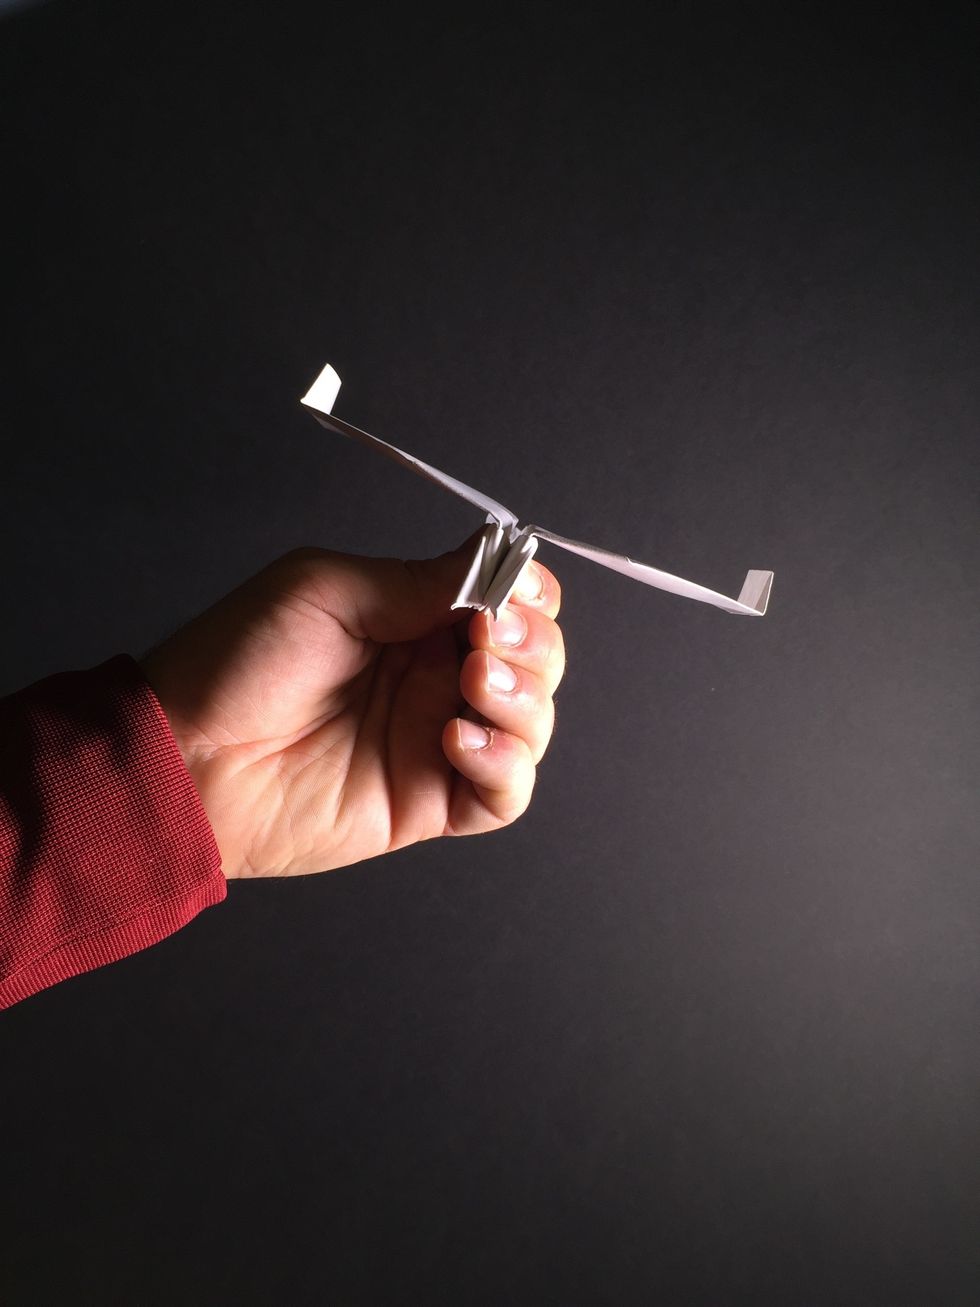
Now the plane should look like this.
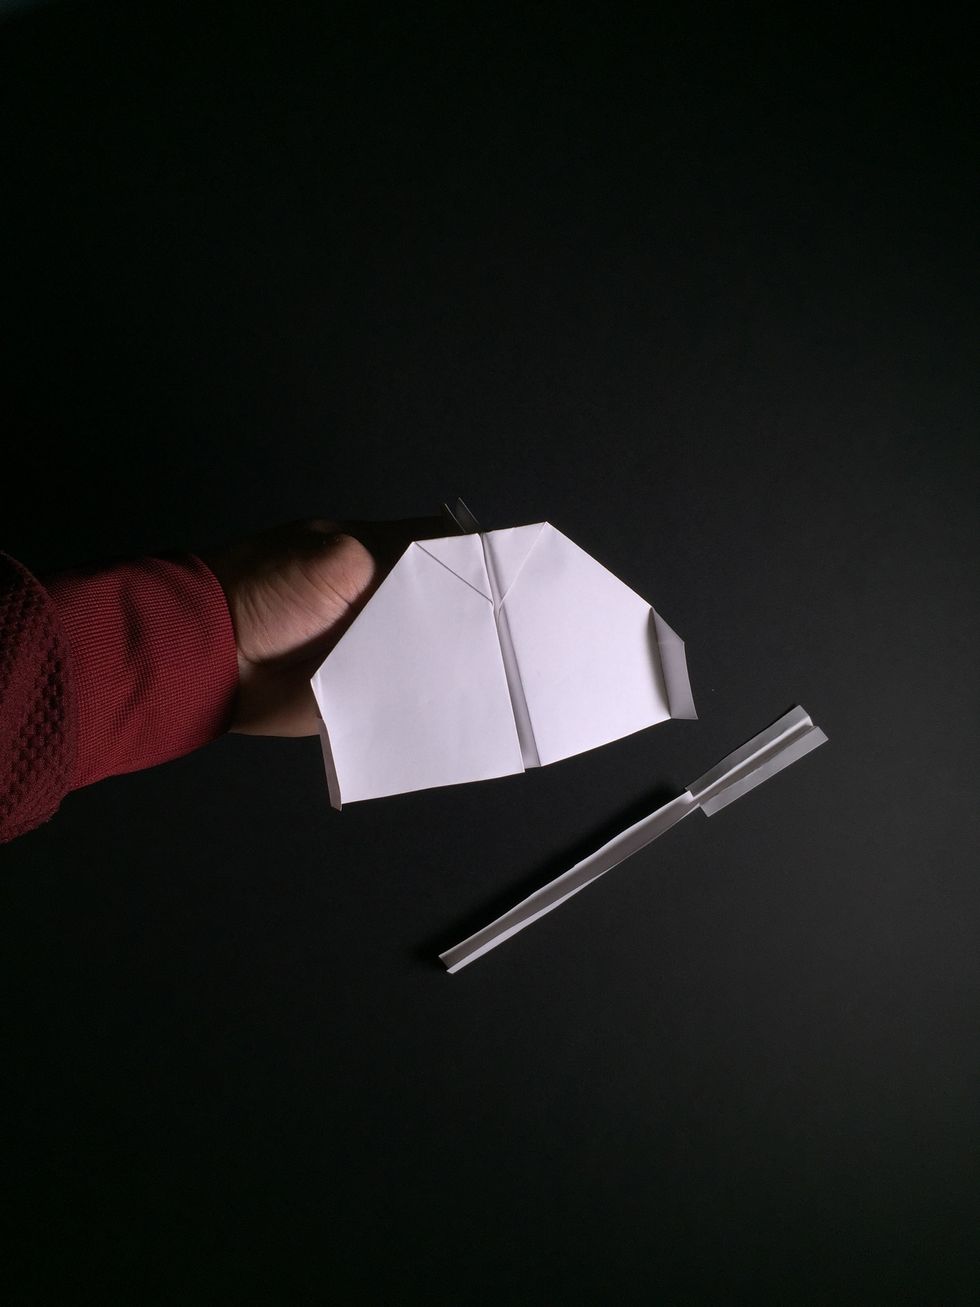
Bend the wingtips up.
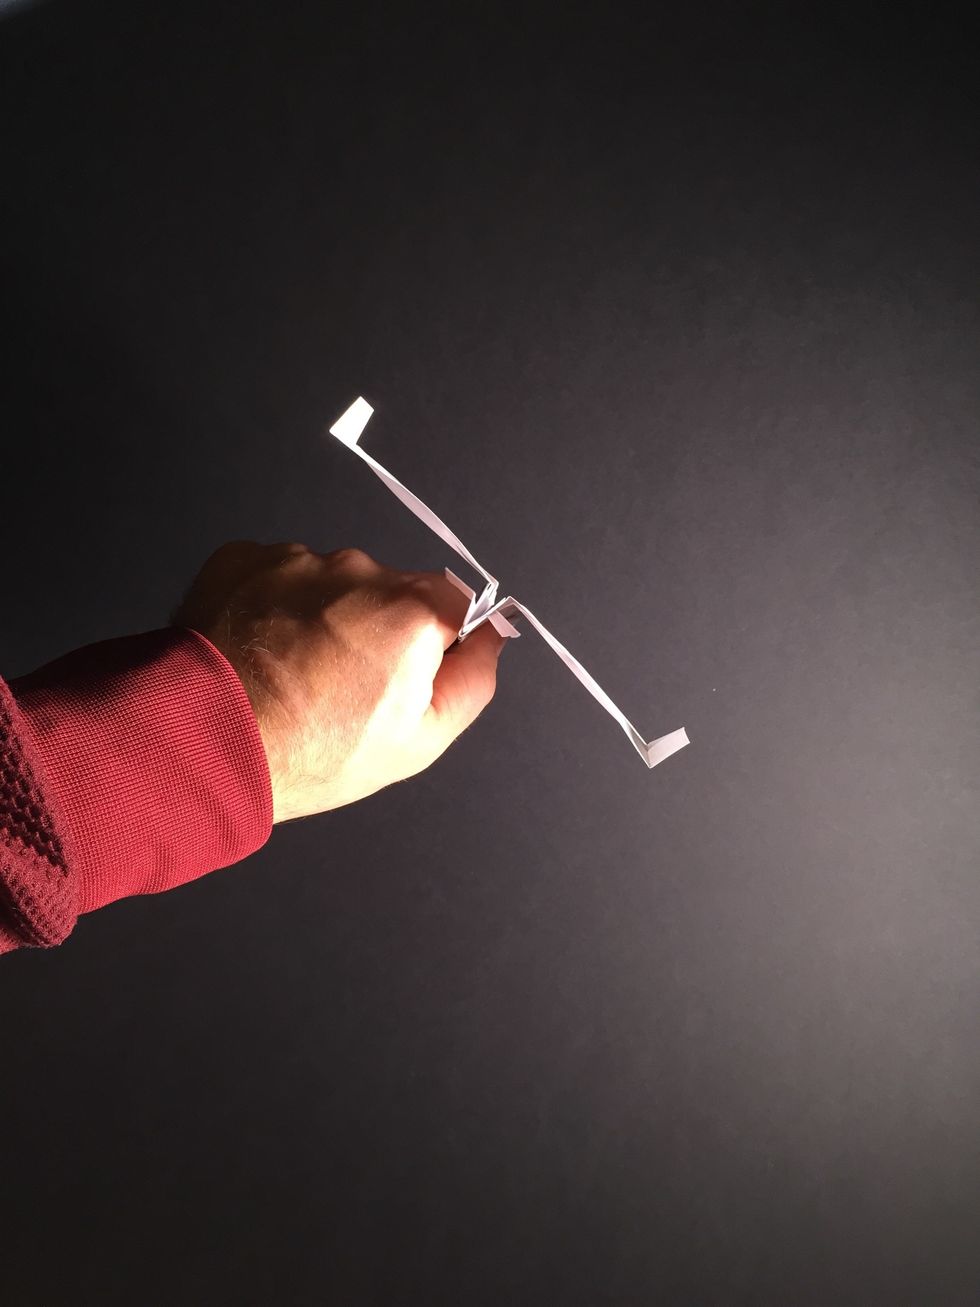
Insert tail into slot under wing.
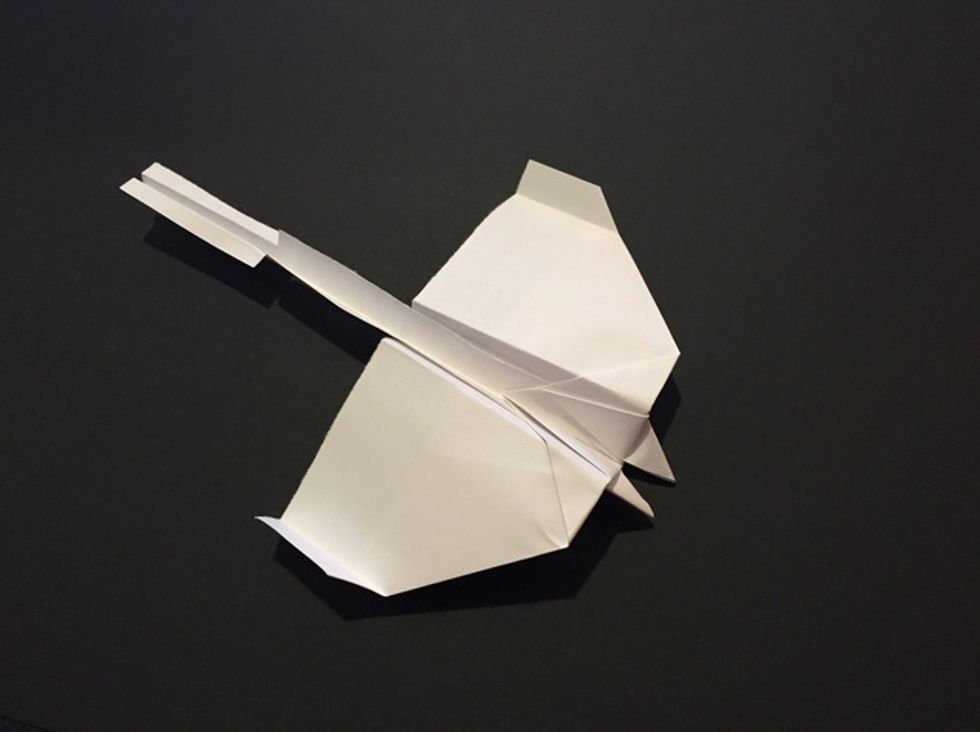
You’ve done it! Aircraft shown with landing gears down. Tip: craft flies better gears up.
Preflight inspection Examine the plane carefully by looking directly at the front and the rear. Like a real airplane, the left and right sides must be exactly the same—mirror images of each other.
If one wing is higher than the other, the surfaces are not at the same angle or the tail is crooked, the plane won’t fly well. Make adjustments to correct any problems.
Fine tuning: If your plane banks left or right, correct this by experimenting with bends on the control surfaces. To gain extra control, cut flaps on the rear edge of the wings and bend up or down.